
July 12, 2026 • General • By Sayad Md Bayezid Hosan
A complete, step-by-step, beginner-friendly A to Z guide to Module 17: Display Advertising and Remarketing — how the Google Display Network actually works, how to set up your first display campaign without wasting budget on the wrong inventory, how to design display ads that pass Google's specs and actually get noticed, how to build remarketing audiences that bring lost visitors back to convert, and exactly how to track, test, and calculate the ROI of every dollar you spend — the exact same measurement framework professional SEM teams use.
📋 Table of Contents
- Welcome to Module 17
- Why This Guide Takes Display Advertising Seriously
- Our E-E-A-T Commitment
- What Is Display Advertising?
- 1. Introduction to Display Advertising
- 2. Setting Up Display Campaigns
- 3. Creating Effective Display Ads
- 4. Remarketing Strategies
- Tracking and Measuring SEM Success
- 5. Key Performance Indicators (KPIs)
- 6. Performance Metrics and Reports
- 7. A/B Testing
- 8. ROI Calculation and Budget Management
- Glossary
- Visual Summary
- FAQ
- What's Next?
Note: this jumps straight to the section you tap — no need to scroll past what you already know.
Welcome to Module 17: Display Advertising and Remarketing
Module 16 covered email — the one channel you fully own. This module covers the opposite end of the spectrum: paid reach you rent by the impression, across the Google Display Network (GDN) and the remarketing audiences that make that spend actually pay off. If Modules 10 through 15 taught you to earn attention, this module teaches you to buy it deliberately, and to buy it back from people who already showed interest and left.
Here's the problem this module solves, stated plainly: most beginners either avoid display advertising entirely because "banner ads don't work anymore," or they turn it on with default settings and burn budget on low-quality inventory with a 0.46% average click-through rate and nothing to show for it. Both reactions come from the same gap — nobody walked them through the actual mechanics step by step. That's exactly what this module does.
Before diving in, if you haven't already gone through the earlier modules in this course, I'd recommend starting there, since each module builds on the concepts that came before it:
- Introduction to Online Digital Marketing: A Beginner's Guide
- Module 3: Social Media Marketing (SMM) — Advertising Concepts and Platform Selection
- Module 4: Meta (Facebook) Marketing — The Complete A to Z Mega Guide
- Module 5: Instagram Marketing — The Complete A to Z Mega Guide
- Module 6: X (Formerly Twitter) Marketing — The Complete A to Z Mega Guide
- Module 7: LinkedIn Marketing — The Complete A to Z Mega Guide
- Module 8: Pinterest Marketing — The Complete A to Z Mega Guide
- Module 9: Creating a WordPress Website — The Complete A to Z Mega Guide
- Module 10: Search Engine Optimization (SEO) — The Complete A to Z Mega Guide
- Module 11: Off-Page Optimization — The Complete A to Z Mega Guide
- A Complete Guide to Automated Sitemap Management for Modern SEO
- Module 13: Algorithm Updates and Analysis — The Complete A to Z Mega Guide for Beginners
- Module 14: Technical SEO Optimization — The Complete A to Z Mega Guide for Beginners
- Module 15: Video Marketing Through YouTube — The Complete A to Z Mega Guide for Beginners
- Module 16: Email Marketing — The Complete A to Z Mega Guide for Beginners
- Module 17: Display Advertising and Remarketing — The Complete A to Z Mega Guide for Beginners
Why This Guide Takes Display Advertising Seriously
Display gets dismissed constantly, and the dismissal is based on a real number that's also badly misunderstood: the average click-through rate across the Google Display Network sits around 0.46%. Read as "success rate," that looks damning. Read correctly — as a channel built for reach, frequency, and bringing people back rather than a direct-response channel measured on clicks alone — that same 0.46% is unremarkable and beside the point. This guide exists to teach the correct read, not the damning one.
The second reason this module earns real attention: the remarketing playbook most beginners find online is dangerously out of date. Similar Audiences were deprecated by Google back in 2023. Third-party cookies no longer work consistently across Safari and Firefox. Google itself renamed "remarketing lists" to "audience segments" inside the actual product. A guide still teaching the 2022 setup will have you building lists that quietly stop working. Section 4 of this module reflects exactly what's true right now, not what used to be true.
Why You Can Trust This Display Advertising Guide (Our E-E-A-T Commitment)
Google's own quality guidelines ask whether content demonstrates real Experience, Expertise, Authoritativeness, and Trustworthiness — E-E-A-T. Here's how this module earns that standard.
Experience. Every step in this module is written as an actual sequence of clicks inside Google Ads, not a description of the concept from a distance. Where a spec or threshold is given — a file size limit, an audience minimum, a benchmark — it's the number currently enforced, not a rounded memory of an older one.
Expertise. This module reflects the real 2026 state of the Google Display Network and remarketing, including the shift toward Performance Max audience signals rather than hard targeting, the Customer Match list-size changes, and the June 2026 consent-mode enforcement that directly affects which visitors can legally be remarketed to. A guide that skipped these would quietly break for any reader who followed it.
Authoritativeness. This is Module 17 in a structured, sequential digital marketing course, building on the SEO foundation from Modules 10-14, the video and email channels in Modules 15-16, and it's published under a consistent, named byline across the entire series.
Trustworthiness. Every benchmark in this module is presented as a realistic range sourced from multiple independent 2026 industry reports, not a single cherry-picked number designed to make display advertising look better or worse than it actually performs.
What Is Display Advertising? A Clear Definition Before We Start
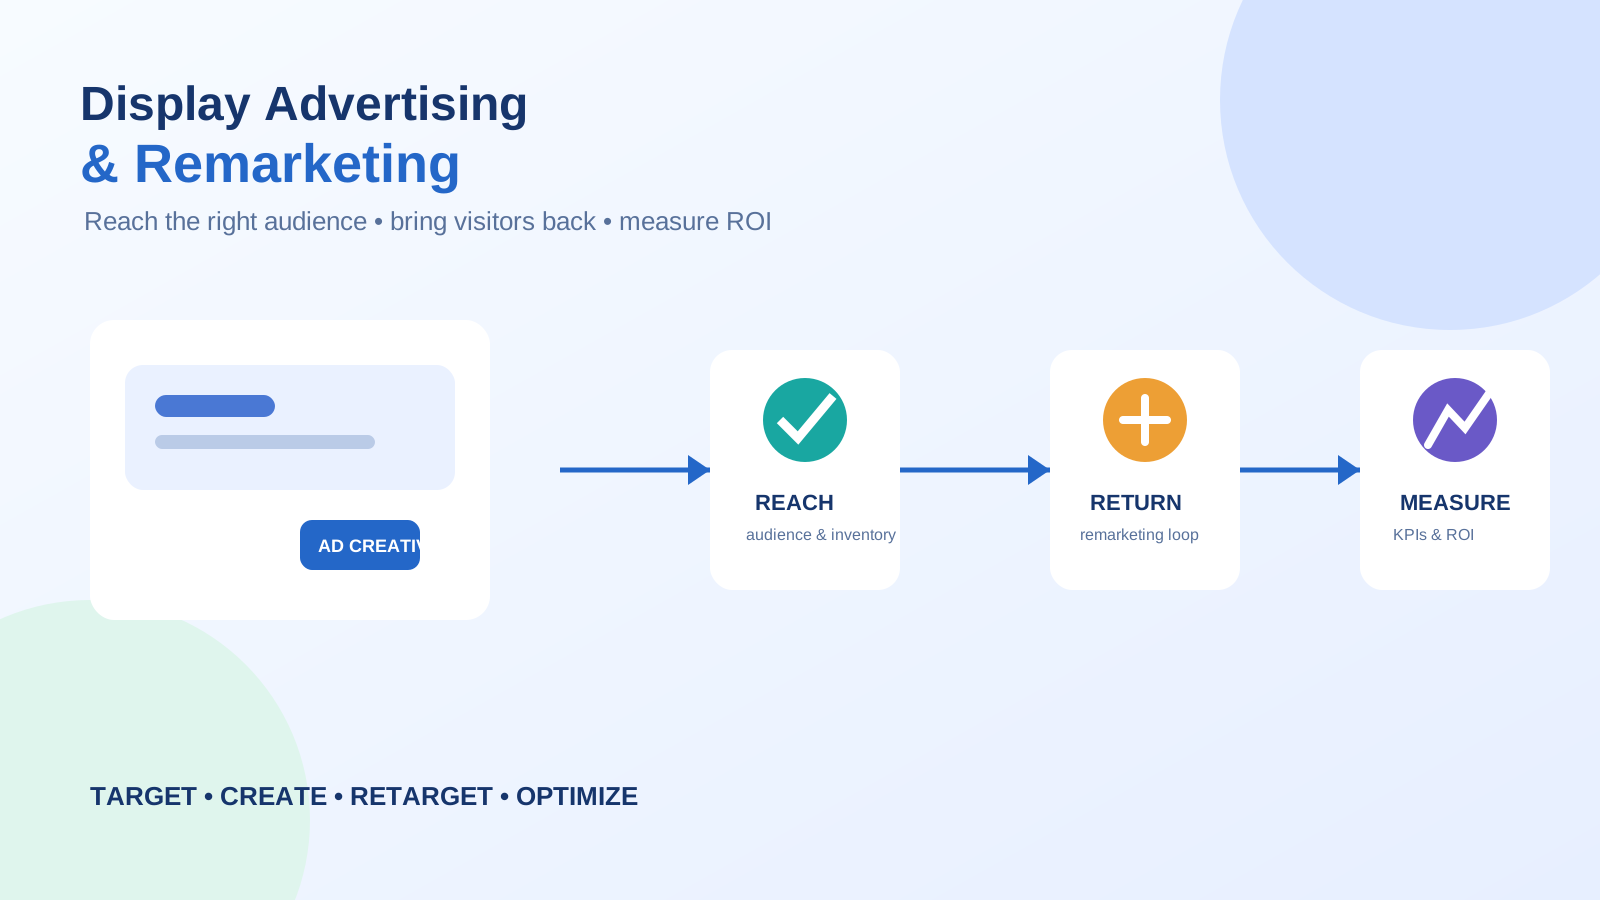
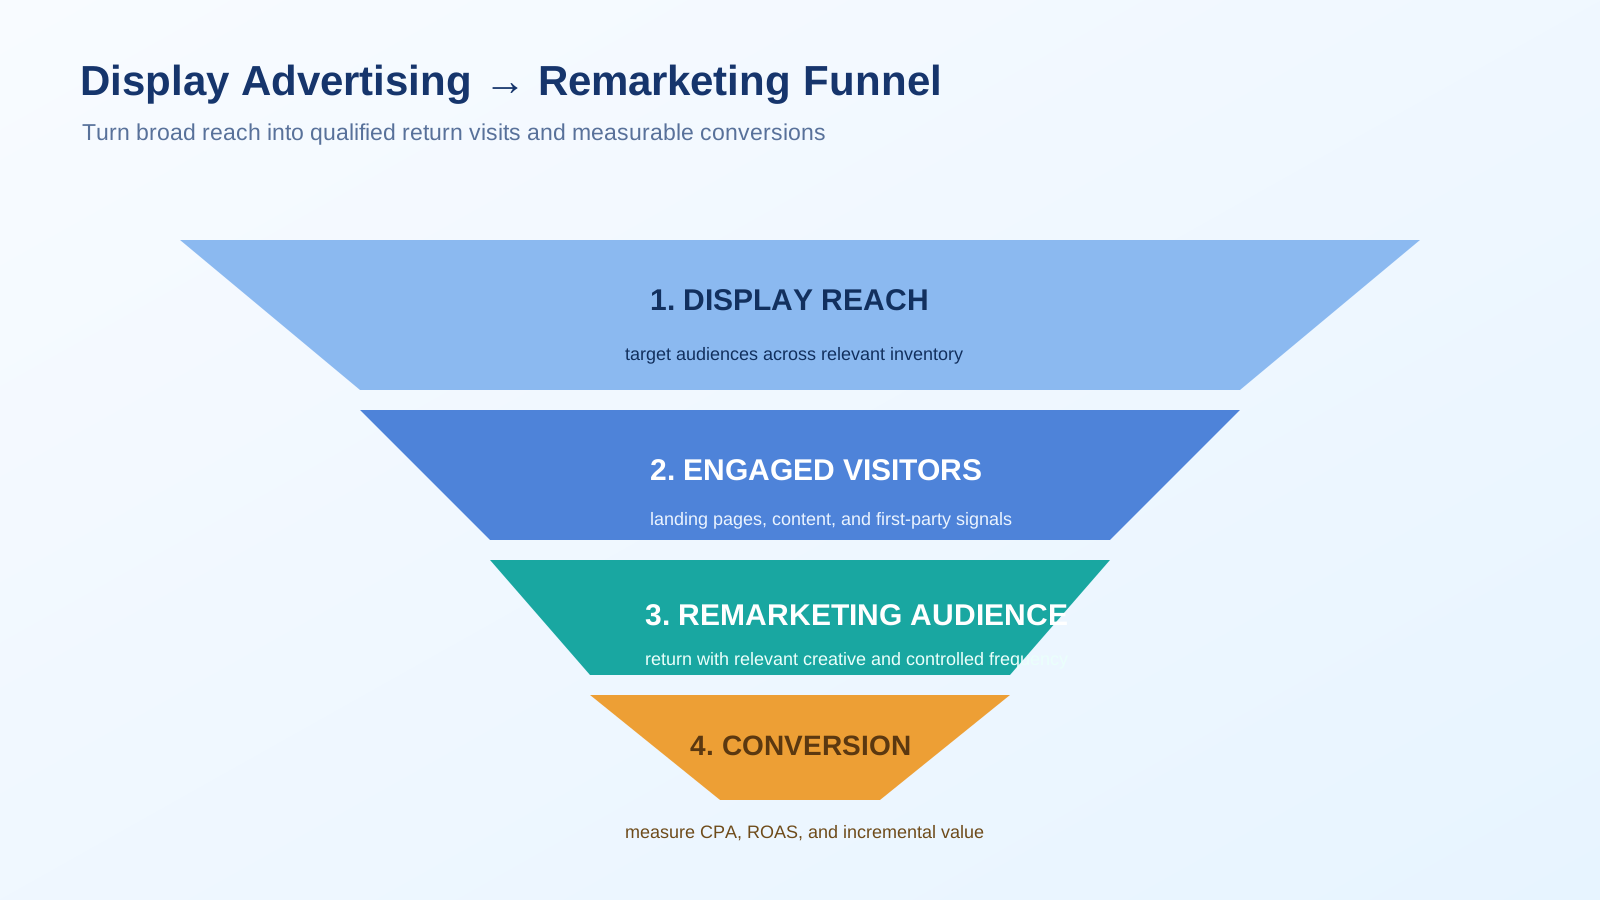
Display advertising is the practice of placing visual ads — banners, images, and rich media — across a network of third-party websites, apps, and platforms, rather than in search results. Remarketing (also called retargeting) is the specific practice of showing those ads to people who already interacted with your business, instead of complete strangers. Together, they form one connected system: display gets your brand in front of the right inventory, and remarketing makes sure the impressions that matter most go to people already close to converting.
The problem this module solves, and the solution in one sentence: most beginners waste display budget on broad, unsegmented targeting because nobody showed them the actual step-by-step setup — this module fixes that by walking through campaign structure, ad creative, and audience building in the exact order you'll actually build them, followed by the measurement framework (KPIs, reporting, testing, and ROI) that tells you whether it's working.
1. Introduction to Display Advertising
The Problem: Why "Just Turn On Display" Fails
Beginners consistently make the same mistake: they treat Display like an add-on to a Search campaign, accept the default settings, and walk away. The Google Display Network reaches over 90% of internet users across more than 3 million websites and 650,000+ apps — including Gmail and YouTube — which means default settings expose your budget to an enormous, largely unfiltered pool of inventory. Without deliberate setup, most of that spend goes to placements that will never convert.
The Solution: Understand What You're Actually Buying
Step 1: Learn the two ways Display ads are built. A static (uploaded) ad is a fixed-size image file you design and control completely — but it only fills placements matching its exact dimensions. A Responsive Display Ad (RDA) is a set of images, logos, headlines, and descriptions that Google's AI assembles automatically to fit almost any available ad slot. RDAs are the default format on the network, and for the large majority of advertisers, they should be your starting point — more coverage, more testing combinations, and a real "Ad Strength" score you can act on.
Step 2: Understand where your ads can actually appear. Beyond ordinary websites, GDN inventory includes Gmail Promotions tab placements, YouTube (covered in more depth in Module 15), and Google-owned properties. This same network is what publishers monetize through AdSense — if you've ever wondered what sits on the other side of the ads you're about to run, our guide to getting AdSense-approved shows the publisher's side of this exact inventory.
Step 3: Set the right expectations before you spend a dollar. Display is fundamentally a reach-and-frequency channel, not a direct-response channel — average CTR sits around 0.46%, and judging a prospecting (cold-audience) campaign by clicks alone will make a perfectly healthy campaign look like a failure. Section 5 covers exactly which metrics you should judge it by instead.
Pro Tip
Never launch a Display campaign as an afterthought tacked onto a Search campaign's settings. Build it as its own campaign, with its own budget, its own goal, and its own success metrics from day one.
2. Setting Up Display Campaigns
The Problem: Getting Lost in the Setup Wizard
Google Ads' campaign creation flow presents a long list of settings with no indication of which ones actually matter for a beginner's first campaign. Getting even one wrong — targeting, budget structure, or exclusions — can quietly waste weeks of spend before anyone notices.
The Solution: A Step-by-Step Setup Sequence
Step 1: Choose the right campaign type. In Google Ads, select New Campaign → Sales, Leads, or Awareness (matching your actual goal) → Display as the campaign type. If you're also considering Performance Max, know the distinction: Performance Max automates placement across Search, Display, YouTube, Discover, Gmail, and Maps from one campaign using audience signals as suggestions, while a standalone Display campaign gives you direct, explicit control over targeting. Beginners should start with standalone Display to learn the mechanics before handing control to full automation.
Step 2: Set your budget and bidding. Start with a daily budget you're genuinely comfortable losing entirely for the first two weeks — this is a real learning period, not a performance guarantee. For bidding, Maximize Clicks or Target CPA are reasonable starting points for beginners over fully manual bidding, since Smart Bidding will out-optimize manual bid adjustments on nearly every dimension except device exclusions.
Step 3: Build your targeting layer by layer. Start broad, then narrow using a combination of: Audience segments (in-market, affinity, or custom audiences built from competitor URLs and relevant keywords), Topics (content categories your ideal customer reads), and Placements (specific sites or apps, used more for exclusion than inclusion at first). Avoid stacking too many narrow layers on day one — an overly narrow campaign simply won't spend its budget or gather enough data to optimize.
Step 4: Set exclusions before you launch, not after. Exclude app categories prone to accidental clicks, exclude placements with low viewability, and set a frequency cap — the empirical sweet spot for 2026 is roughly 5-7 impressions per user per week for prospecting campaigns, tightening to 3-5 for remarketing (covered in Section 4). Skipping this step is the single most common reason a first campaign's budget disappears without meaningful results.
Step 5: Install and verify your tracking before spending a cent. Add the Google tag (or confirm it's firing via Google Tag Manager) and connect conversion tracking. If you're running this alongside other channels, tag every destination URL with UTM parameters using a tool like SmartGen's UTM Builder — our complete guide to UTM campaign links walks through exactly how to structure these so Display traffic is never miscounted as direct traffic in your reports.
Pro Tip
Build a naming convention for campaigns and ad groups before you launch your first one — something like Display_Prospecting_ProductA_2026Q3. It costs five minutes now and saves hours of confusion once you're running ten campaigns instead of one.
3. Creating Effective Display Ads
The Problem: Ads That Get Rejected or Ignored
Two failure modes dominate here: ads that violate Google's technical specs and simply don't run, and ads that run perfectly but blend into banner blindness because they weren't designed to earn a glance in a hostile visual environment.
The Solution: Design to Spec, Then Design to Be Seen
Step 1: Know the exact specs before you design anything. Static image ads must stay under 150KB (JPG, PNG, or GIF; animated GIFs capped at 30 seconds). For Responsive Display Ads, prepare assets across the four aspect ratios Google actually uses: 1.91:1 landscape (upload at 1200×628), 1:1 square, 4:5 portrait (increasingly important for YouTube Shorts and Discover placements), and 9:16 vertical. Avoid more than roughly 20% text coverage on any image — Google's system discounts image assets that are text-heavy.
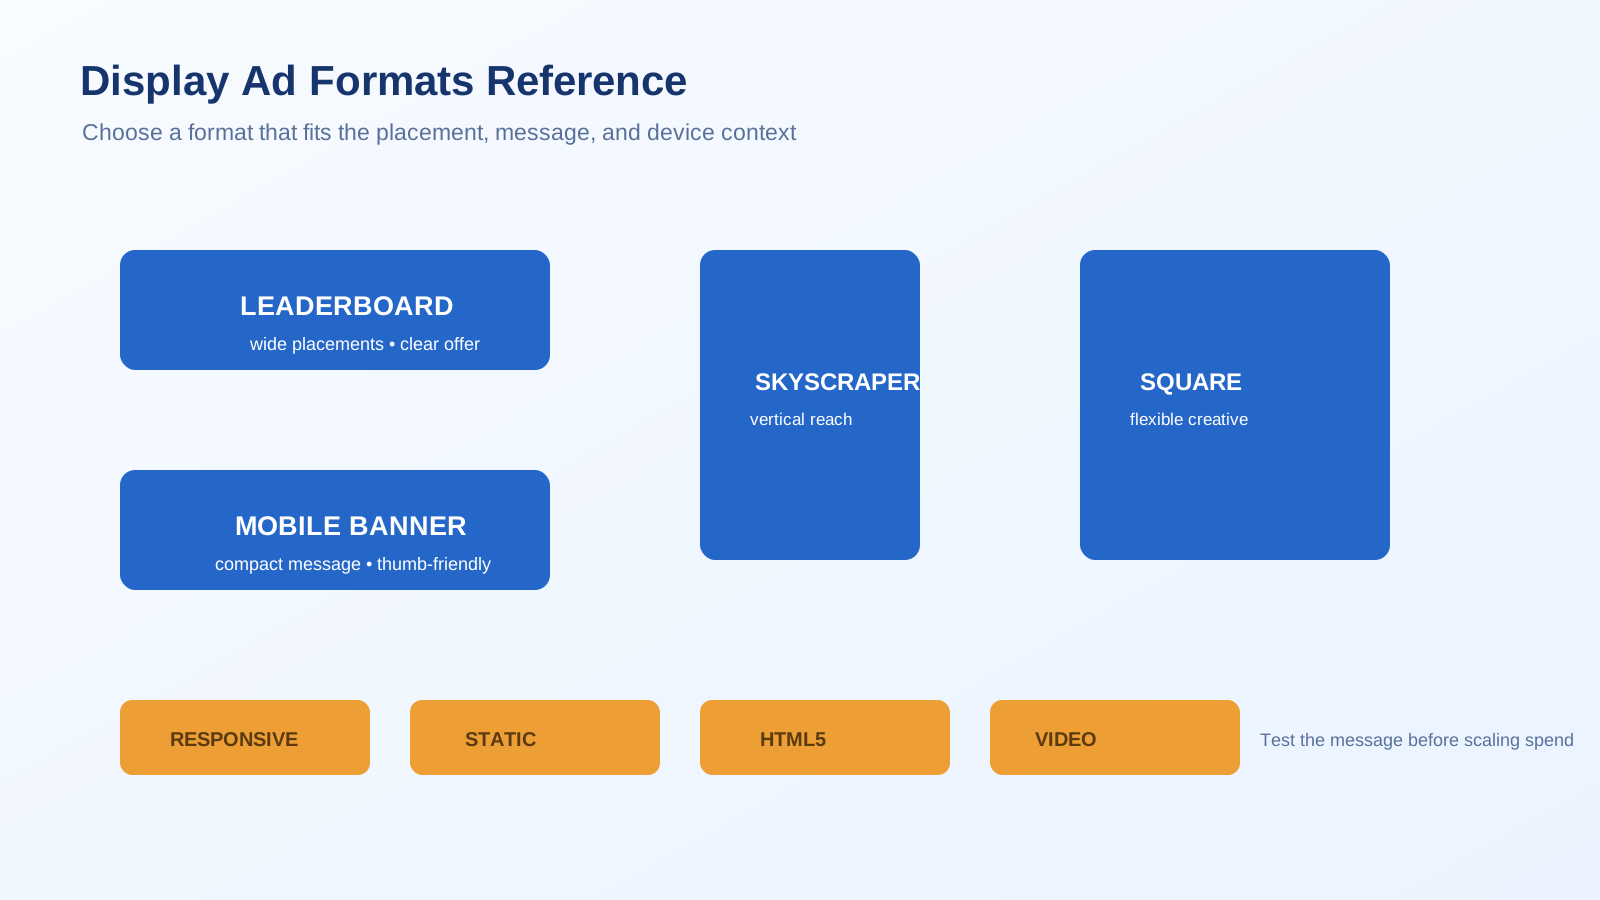
Step 2: Prioritize the sizes that cover the most inventory. If you're producing any static, uploaded creative alongside your RDAs, prioritize these five in order: 300×250 (Medium Rectangle — the single highest-priority size, covering the most inventory across both desktop and mobile), 728×90 (Leaderboard, desktop only), 336×280 (Large Rectangle), 300×600 (Half Page), and 320×50 (Mobile Banner). These five alone cover roughly 90% of available GDN inventory. The reference visual later in this module lays these out at a glance.
Step 3: Keep every asset on-brand. Inconsistent colors and typography across ad variations reduce recognition and, over a campaign's life, measurably hurt recall. Lock in your palette before producing variations — SmartGen's Color Palette Extractor can pull an exact hex palette straight from your existing logo or website so every banner matches without guesswork.
Step 4: Compress before you upload. Getting a crisp image under the 150KB static limit without visible quality loss is a common sticking point — run every export through SmartGen's Image Compressor first rather than manually guessing at export quality settings.
Step 5: Write copy that earns a glance, not just fills space. A clear, singular value proposition and one unambiguous call-to-action consistently outperform clever-but-vague copy in a format where the average viewer spends well under a second deciding whether to look further. Supply Google with the full complement of headlines, long headlines, and descriptions for every RDA — partial asset sets measurably cap your Ad Strength and, with it, your eligible inventory.
Step 6: Build a refresh schedule from day one. Plan to rotate creative every 2-4 weeks for any campaign running meaningful frequency — this is covered in depth in Section 4, but it applies to prospecting campaigns too, not remarketing alone.
Pro Tip
If your brand has strict visual guidelines, be aware that Responsive Display Ads can fall back to text-only assembly in some placements. Run a small number of fully static, uploaded ads alongside your RDAs specifically to guarantee pixel-perfect brand control in your highest-value placements.
4. Remarketing Strategies
The Problem: Losing 98% of Your Traffic for Good
Most visitors never convert on their first visit — abandonment before any meaningful action is the overwhelming norm, not the exception. Without remarketing, every one of those visitors is gone the moment they close the tab, and you pay to acquire their attention again from zero.
The Solution: Build the Right Audiences, Then Match the Right Format to Each One
Step 1: Understand your audience-list options. Google Ads now labels these audience segments in-product (the underlying concept is still commonly called remarketing or retargeting). Your three core sources: website visitor lists (built from the Google tag, segmentable by page and behavior), Customer Match (your own first-party email, phone, or mailing-list data, uploaded directly), and YouTube engagement lists (viewers, subscribers, and channel interactors). Given that Safari and Firefox block third-party cookies by default and Safari's Intelligent Tracking Prevention limits first-party cookie life to roughly 7 days in many configurations, Customer Match has become the most reliable list you can build — this is exactly why the list-building work in Module 16's email marketing guide now doubles as remarketing infrastructure, not just an email asset.
Step 2: Match the remarketing type to the goal.
- Standard remarketing shows ordinary display ads to past visitors browsing the wider Display Network — best for general brand recall.
- Dynamic remarketing shows the exact product or page a visitor viewed, pulled from a live product feed — meaningfully higher engagement than generic creative, but it requires a properly linked Google Merchant Center feed and the Google tag firing with
ecomm_prodid,ecomm_pagetype, andecomm_totalvalueparameters on every relevant page. - RLSA (Remarketing Lists for Search Ads) doesn't show banners at all — it adjusts your Search bids and keyword reach specifically for people who already visited your site, letting you bid more competitively on broader terms for an audience you know is already familiar with your brand.
- YouTube remarketing serves video ads to past visitors and channel engagers, best suited to consideration-stage messaging (a testimonial, a walkthrough) rather than a cold awareness pitch.
Step 3: Set list windows that match real buying behavior, not one blanket duration for everything: roughly 7-14 days for cart abandoners (urgency is genuinely time-sensitive here), 30-60 days for general site visitors, and up to the platform's 540-day maximum for high-consideration, long-cycle purchases.
Step 4: Get consent right — this is a legal requirement, not a best practice. Remarketing tags must fire only after a visitor grants consent through your cookie banner, configured via Consent Mode. Google enforces this with real teeth: as of June 15, 2026, only users who've granted ad_storage consent are eligible for remarketing list inclusion at all. A site with weak consent-mode implementation will see its lists quietly shrink and under-refresh with no obvious error message.
Step 5: Retire "Similar Audiences" from your plan. Google deprecated this feature in 2023. If you're following a guide or a memory of a setup that still recommends it, replace it with optimized targeting and audience expansion, both built into current campaign settings — these use your defined lists as a signal for Google's system to find comparable users, rather than a fixed lookalike list you control directly.
Step 6: Refresh creative on a real schedule. Rotate remarketing creative every 2-4 weeks, and treat a declining click-through rate on a specific list as your clearest fatigue signal — a stale ad shown to the same warm audience for months will measurably underperform a fresh one, regardless of how well the audience itself is built.
Pro Tip
Segment your website-visitor list by intent, not just by "all visitors." A visitor who reached your pricing page and a visitor who bounced from your homepage in four seconds are not the same audience, and treating them identically is the single most common reason remarketing campaigns underperform their potential.
Tracking and Measuring SEM Success
Everything so far has covered building the campaign. This next part covers proving it worked — the exact measurement discipline that separates a professional SEM operation from a "set it and hope" one. Four things matter here, in this order: knowing which numbers to watch (Section 5), reading them correctly in a report (Section 6), testing systematically instead of guessing (Section 7), and translating all of it into a real ROI figure your budget decisions can rest on (Section 8).
5. Key Performance Indicators (KPIs)
The Problem: Watching the Wrong Number
The most common beginner mistake in this entire module happens here: judging every campaign by click-through rate alone, then either panicking over a "low" 0.46% CTR on a healthy prospecting campaign or missing a genuine problem in a remarketing campaign that should be performing far above that baseline.
The Solution: Match the KPI to the Campaign's Actual Job
Step 1: For prospecting (cold-audience) campaigns, prioritize reach-oriented KPIs first. Viewability (the IAB/MRC standard: 50% of the ad's pixels visible for at least 1 continuous second) should be your foundational gate — a "good" rate is 70%+, and anything reported under 60% is worth renegotiating placements over before you optimize anything else. CPM (cost per 1,000 impressions) tells you what you're paying for that reach; expect real variation by inventory quality, roughly $2-5 on standard GDN placements versus $5-15 on curated private marketplace deals.
Step 2: For remarketing campaigns, hold CTR to a completely different bar. Because these ads reach people who already know you, a healthy remarketing CTR should land meaningfully above the cold-display baseline — treat anything close to the 0.46% cold-audience average as a warning sign specifically on a remarketing list, not a neutral result.
Step 3: Track CPA and ROAS as your bottom-line KPIs across both. Cost Per Acquisition (total spend ÷ conversions) and Return on Ad Spend (revenue ÷ spend) are what actually justify continued budget — reach and clicks are leading indicators, but these two are the numbers a real budget conversation should be built around, covered fully in Section 8.
Step 4: Watch invalid traffic (IVT) rate as a quality check, particularly on open-exchange inventory, where IVT commonly runs 8-15% versus 2-3% on verified, curated inventory. A cheap CPM sitting on top of high IVT is not actually cheap once you account for the impressions that were never real.
Pro Tip
Build a simple weekly KPI dashboard with no more than five numbers on it: viewability, CTR (segmented by prospecting vs. remarketing), CPA, ROAS, and spend pacing against budget. A dashboard with thirty metrics gets checked once and ignored; a five-metric dashboard gets checked every week.
6. Performance Metrics and Reports
The Problem: Data Without a Decision Attached
Google Ads generates enormous amounts of reporting data, and a beginner staring at a full performance report with no framework for reading it usually does one of two unhelpful things: ignores it entirely, or reacts to a single day's noisy fluctuation as if it were a trend.
The Solution: A Repeatable Reporting Routine
Step 1: Set a fixed reporting cadence — weekly for tactical checks (pacing, obvious problems), monthly for real optimization decisions (pausing underperforming ad groups, reallocating budget). Never make a structural change to a campaign based on a single day of data.
Step 2: Read metrics together, not in isolation. A high CTR with a low conversion rate points to a landing-page or offer mismatch, not a targeting problem. A low CTR with strong viewability and a healthy CPA on a prospecting campaign may simply mean the campaign is doing exactly its job — building qualified remarketing pools for Section 4 to work with later.
Step 3: Segment every report by campaign type before drawing conclusions. Blending prospecting and remarketing performance into one blended number hides the story in both directions — a strong remarketing CTR can mask a genuinely weak prospecting campaign, and vice versa.
Step 4: Connect Display performance to your broader analytics, not just the Google Ads interface in isolation. If you haven't already connected Google Ads conversion data to a proper analytics setup, our Google Web Analytics guide walks through exactly how to see the full visitor journey, not just the last click Google Ads reports natively.
Step 5: Check landing page quality alongside ad performance. A well-targeted, well-designed ad sending traffic to a slow or poorly structured landing page will show a healthy CTR and a disappointing conversion rate — if that pattern shows up in your reports, revisit your landing pages against the Core Web Vitals standards covered in Module 14's technical SEO guide before assuming the ad itself is the problem.
Pro Tip
Whenever you calculate a rate metric by hand while reviewing a report — CTR, conversion rate, or a percentage change month over month — a quick tool like SmartGen's Percentage Calculator is faster and less error-prone than doing the division in your head under a deadline.
7. A/B Testing
The Problem: Changing Everything at Once and Learning Nothing
A beginner who redesigns an ad's image, headline, and call-to-action simultaneously and sees performance improve has no way to know which change actually caused it — and no way to repeat the win deliberately next time.
The Solution: Test One Variable, On a Real Schedule
Step 1: Test one element at a time — a headline, a primary image, a call-to-action, or an audience segment — never several at once in the same test. This is the entire discipline; everything else in this section supports it.
Step 2: Use Google Ads' own experiment tools (Drafts & Experiments) to run a genuine, split-traffic test rather than simply alternating creative manually and comparing week over week, which conflates your test with normal day-to-day and seasonal variance.
Step 3: Let a test run long enough to be trustworthy. A test stopped after 200 impressions and a "clear leader" is very likely reading noise. As a practical rule for a beginner without access to a formal statistical-significance calculator, don't call a winner before each variant has accumulated a meaningful, comparable volume of clicks — patience here is the single biggest difference between real signal and a false result.
Step 4: Test in priority order. Creative (image, headline) and audience targeting produce larger performance swings than smaller tweaks like button color, so beginners should test the big levers first and save micro-optimizations for later, once the fundamentals are already working.
Step 5: Document every test, win or lose. A losing test is still information — it rules out a hypothesis and prevents you from re-testing the same idea in six months having forgotten you already tried it.
Pro Tip
Treat A/B testing as a permanent habit built into every campaign, not a one-time project you run once and consider finished — the campaigns that improve steadily over a year are the ones testing continuously, not the ones that ran one big test in January.
8. ROI Calculation and Budget Management
The Problem: Spending With No Clear Line to Revenue
Plenty of display campaigns generate respectable clicks and reasonable CPCs while nobody on the team can actually say whether the campaign made or lost money. Without a clear ROI calculation, budget decisions default to gut feeling.
The Solution: A Simple, Repeatable ROI Framework
Step 1: Know the core formula. ROI = (Revenue Attributed to Campaign − Ad Spend) ÷ Ad Spend, expressed as a percentage. ROAS (Return on Ad Spend) is the closely related figure most platforms report natively: Revenue ÷ Spend. A ROAS of 4 means $4 in revenue for every $1 spent — translate this to ROI by subtracting 1 (a ROAS of 4 is a 300% ROI).
Step 2: Calculate it for real, not just in your head. Pull your actual spend and attributed revenue for the period, and run them through a dedicated calculator rather than a rough mental estimate — SmartGen's CPM & ROI Calculator is built for exactly this, letting you model different CPM, CTR, and conversion-rate assumptions before you commit real budget, not just measure after the fact.
Step 3: Separate prospecting ROI from remarketing ROI. Blending the two into one campaign-level ROI figure hides the fact that they typically operate on very different economics — remarketing consistently shows a materially lower cost per acquisition than cold prospecting, and treating them as one number can lead you to under-fund the remarketing work that's actually carrying the account's efficiency.
Step 4: Allocate budget using a simple split, then adjust with data. A reasonable beginner starting point is roughly 70% of Display budget toward prospecting (building the remarketing pool for tomorrow) and 30% toward remarketing (harvesting today's pool) — then shift the ratio over time based on which side is actually delivering the stronger ROAS in your own reports, not a generic rule.
Step 5: Build in a review-and-reallocate cadence. Monthly is a reasonable default: review ROI by campaign type, pause or reduce anything consistently underperforming your target CPA, and shift that freed budget toward whatever is currently outperforming it.
Pro Tip
Never evaluate a new prospecting campaign's ROI in isolation during its first two to four weeks. Its real value includes the remarketing pool it's building for next month — a prospecting campaign that looks break-even in isolation can be genuinely profitable once you account for the remarketing revenue it enables downstream.
Display Advertising Glossary: Key Terms Explained
- Google Display Network (GDN) — Google's network of third-party sites, apps, and owned properties where display ads can appear.
- Responsive Display Ad (RDA) — an ad format where Google assembles your assets automatically to fit available placements.
- Remarketing / Retargeting — showing ads specifically to people who already interacted with your business.
- Customer Match — uploading your own first-party customer data to build a remarketing audience.
- RLSA — Remarketing Lists for Search Ads; adjusting Search bids and reach for past site visitors.
- Dynamic Remarketing — showing the exact product or page a visitor previously viewed, via a live feed.
- Viewability — whether an ad was actually visible to a user, per the IAB/MRC 50%-for-1-second standard.
- CPM — Cost Per Mille (thousand impressions); the price of reach.
- CTR — Click-Through Rate; clicks divided by impressions.
- CPA — Cost Per Acquisition; total spend divided by conversions.
- ROAS — Return on Ad Spend; revenue divided by spend.
- Frequency Cap — a limit on how many times one user sees your ad in a given period.
- Ad Strength — Google's rating of how well an RDA's assets are set up to compete and be tested.
- Performance Max (PMax) — an automated campaign type spanning Search, Display, YouTube, Discover, Gmail, and Maps.
- E-E-A-T — Experience, Expertise, Authoritativeness, and Trustworthiness; Google's content quality framework.
Visual Summary
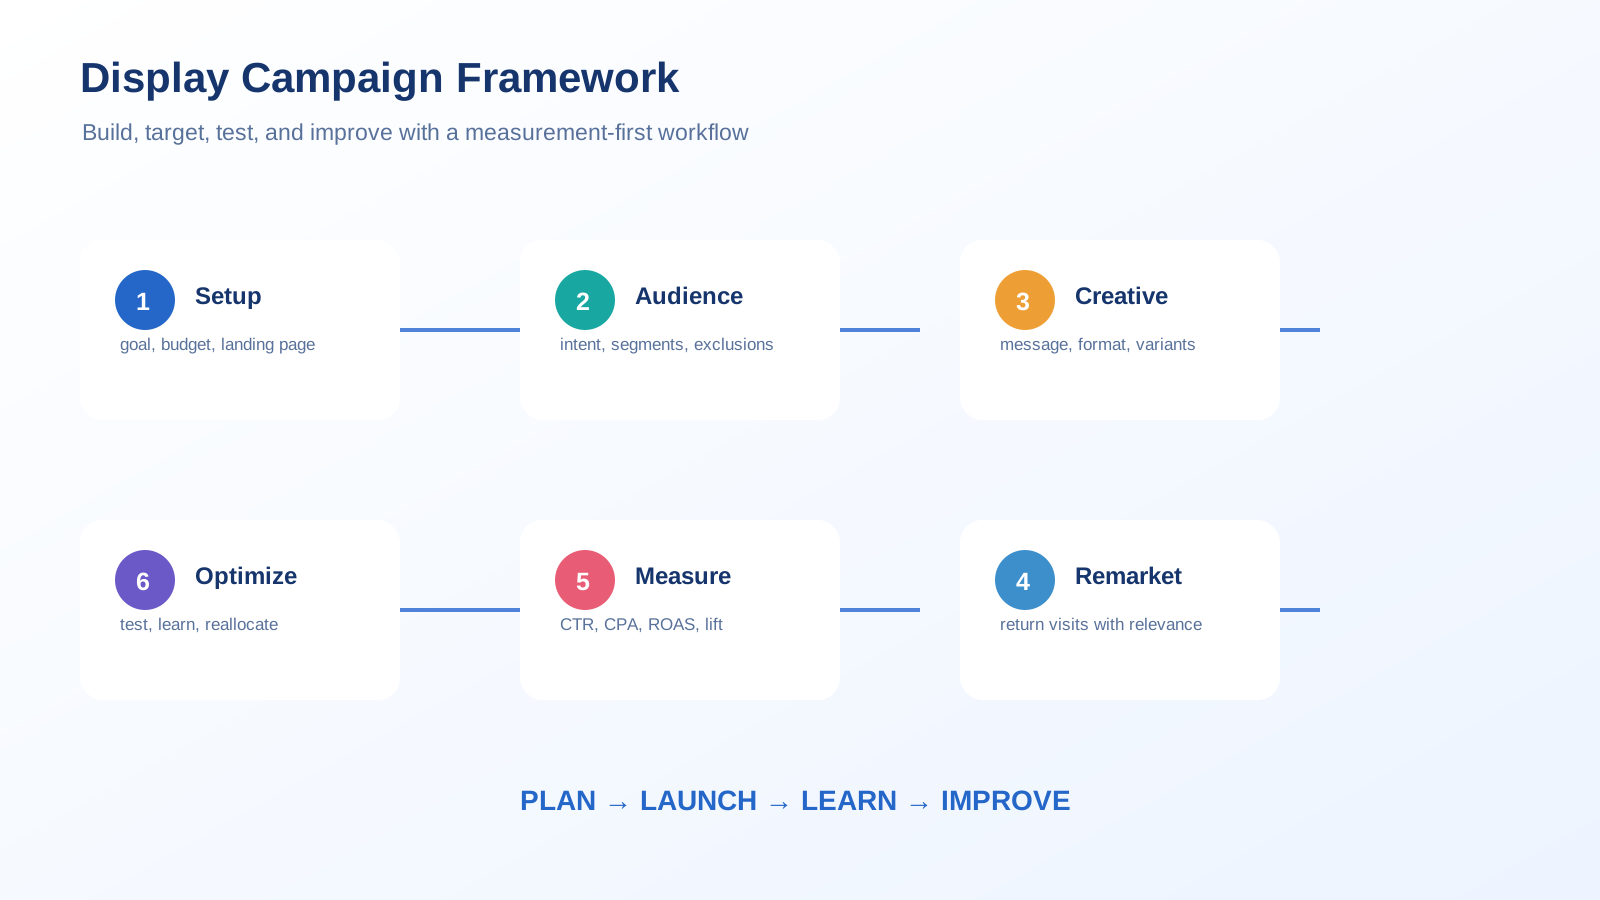
Below are two original visuals built specifically for this guide: a complete infographic mapping the full display advertising and remarketing system covered in this module, and a practical ad-size reference chart for building your first display creative.
Module 17 Mega Guide Summary
In this module, we treated display advertising as exactly what it is — a reach-and-frequency channel that most beginners misjudge by holding it to a direct-response standard it was never built for. We covered how the Google Display Network actually works and what you're really buying with a default-settings campaign. We covered the step-by-step process for setting up a Display campaign correctly the first time, from campaign type through tracking. We covered creating effective display ads to spec, including exact sizes, file limits, and the brand-consistency and compression steps that separate professional creative from rejected uploads. We covered remarketing strategies as they genuinely work in 2026 — Customer Match's rising importance, the Similar Audiences deprecation, and the June 2026 consent requirements. And we closed with the complete SEM measurement framework: the right KPI for the right campaign type, a repeatable reporting routine, disciplined A/B testing, and a real ROI and budget-allocation process.
Practice exercise: This week, pick one page on your own site and build the full loop from this module: install and verify remarketing tag tracking, create one Customer Match list from your existing customer emails, design a single Responsive Display Ad following the specs in Section 3, and calculate a target ROAS for it using SmartGen's CPM & ROI Calculator before you spend a single dollar.
Frequently Asked Questions
Is display advertising still effective, or has everyone moved to social and search?
Effective, but only when judged by the right metric. Average display CTR (around 0.46%) looks weak next to search, but display was never built to be judged on clicks alone — its real value is reach, brand recall, and remarketing efficiency, and remarketing specifically continues to outperform cold prospecting by a wide margin on both CTR and cost per acquisition.
What's the difference between remarketing and RLSA?
Remarketing (standard or dynamic) shows banner or video ads to past visitors across the Display Network, Gmail, or YouTube. RLSA doesn't show any banners at all — it adjusts your bids and keyword reach on Search campaigns specifically for people who already visited your site, letting you compete more aggressively for broader terms with an audience you know is already warm.
Do I need a huge list before I can start remarketing?
No — minimum list-size requirements have dropped significantly, with the threshold for Display and Search remarketing now as low as 100 users. Start building your website-visitor and Customer Match lists from day one, even if your traffic is modest; they'll be ready by the time you have budget to use them properly.
Is Similar Audiences still a real targeting option?
No — Google deprecated Similar Audiences in 2023. If a guide, template, or old memory of the Google Ads interface references it, replace it with optimized targeting and audience expansion, which use your existing lists as signals for Google's system rather than a separate, defined lookalike list.
How much of my budget should go to prospecting versus remarketing?
There's no universal ratio, but a reasonable beginner starting point is roughly 70% prospecting and 30% remarketing, adjusted over time based on which side is delivering the stronger ROAS in your own account. Remember that prospecting spend also builds tomorrow's remarketing pool, so don't judge it purely on its own immediate ROI.
What image file size limit do I need to hit for display ads?
Static uploaded image ads must stay under 150KB (JPG, PNG, or GIF), and animated GIFs are capped at 30 seconds. If you're consistently struggling to hit that limit without visible quality loss, run your exports through a dedicated image compressor rather than adjusting quality settings by trial and error.
How long should I run an A/B test before picking a winner?
Long enough that each variant has accumulated a meaningful, comparable volume of clicks — not a fixed number of days. Calling a winner after a few hundred impressions is one of the most common ways beginners mistake ordinary noise for a real result.
— Written by Sayad Md Bayezid Hosan for the SmartGen blog
 ✓
✓
Sayad Md Bayezid Hosan
Founder & Tech Entrepreneur | Full-Stack Developer
Full-stack Web Developer, Digital Marketing Strategist, and Tech Entrepreneur with 5+ years of experience delivering innovative digital solutions. Specializing in web development, AI integration, strategic digital marketing, and tech entrepreneurship. As a leading Tech Provider, I help audiences navigate digital platforms safely through permission-based technical solutions and digital business asset management.
Credentials & Expertise:
- Founder of CWB Agency & GenZFrontier
- Final-year English Student at Northern University Bangladesh
- Specialized in AI-powered web development & content strategy
- Published author on tech, digital marketing & entrepreneurship
What's Next?
Take a moment to revisit the earlier lessons in this course if you need a refresher, since each module builds on what came before it:
- Introduction to Online Digital Marketing: A Beginner's Guide
- Module 3: Social Media Marketing (SMM) — Advertising Concepts and Platform Selection
- Module 4: Meta (Facebook) Marketing — The Complete A to Z Mega Guide
- Module 5: Instagram Marketing — The Complete A to Z Mega Guide
- Module 6: X (Formerly Twitter) Marketing — The Complete A to Z Mega Guide
- Module 7: LinkedIn Marketing — The Complete A to Z Mega Guide
- Module 8: Pinterest Marketing — The Complete A to Z Mega Guide
- Module 9: Creating a WordPress Website — The Complete A to Z Mega Guide
- Module 10: Search Engine Optimization (SEO) — The Complete A to Z Mega Guide
- Module 11: Off-Page Optimization — The Complete A to Z Mega Guide
- A Complete Guide to Automated Sitemap Management for Modern SEO
- Module 13: Algorithm Updates and Analysis — The Complete A to Z Mega Guide for Beginners
- Module 14: Technical SEO Optimization — The Complete A to Z Mega Guide for Beginners
- Module 15: Video Marketing Through YouTube — The Complete A to Z Mega Guide for Beginners
- Module 16: Email Marketing — The Complete A to Z Mega Guide for Beginners
- Module 17: Display Advertising and Remarketing — The Complete A to Z Mega Guide for Beginners