
July 14, 2026 • General • By Sayad Md Bayezid Hosan
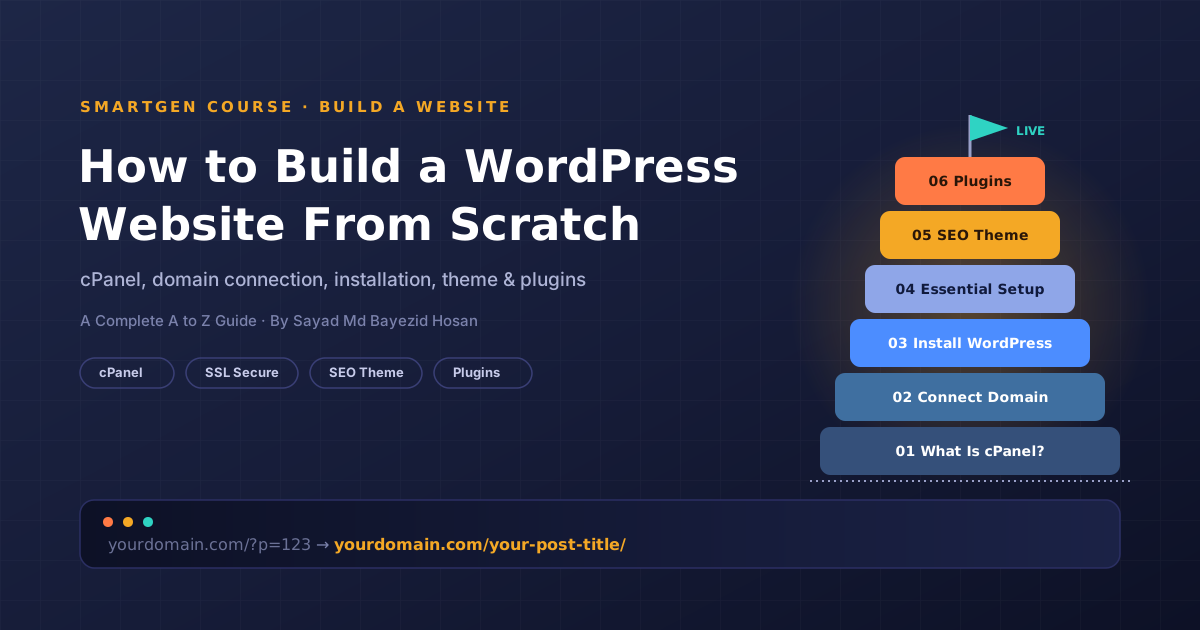
How to Build a WordPress Website From Scratch
WordPress now runs a larger share of the world's websites than every other platform combined, and the reason is simple: once you understand six things — cPanel, domain connection, installation, essential setup, theme choice, and plugins — you can build a genuinely professional, SEO-ready website without writing a single line of code. This guide walks through all six, in the exact order you'll actually do them, from the moment you log into your hosting account for the first time to the moment your site is live, secure, and ready for content.
No prior technical background is assumed. Every step below tells you exactly which menu to click and exactly what to type, using the standard cPanel hosting environment that the large majority of shared and business hosting providers use today.
What You'll Build
By the end of this guide, you'll have a live WordPress website with a working domain, SSL security, an SEO-structured theme, and the core plugins every professional site needs — installed, configured, and ready for content.
- What Is cPanel?
- Connect Your Domain to Your Hosting
- Install WordPress (Step-by-Step)
- Essential Setup After WordPress Installation
- Install an SEO-Structured Theme
- Useful Plugins: Installation & Setup
What Is cPanel? {#what-is-cpanel}
cPanel is a web-based control panel that lets you manage every technical part of your web hosting account — files, databases, email accounts, domains, and software installations — through a visual dashboard instead of typing server commands. It's the layer that sits between you and the actual server your website lives on, and for most beginners, it's the very first screen you'll see after signing up for hosting.
You'll typically reach cPanel one of two ways: through a "Login to cPanel" button inside your hosting provider's client dashboard, or directly by visiting yourdomain.com/cpanel (or yourdomain.com:2083 if the domain isn't connected yet) and logging in with the username and password your host emailed you at signup.
Once inside, a handful of sections matter far more than the rest, and knowing them now saves a lot of hunting around later:
- File Manager — a browser-based way to view, edit, and upload the actual files that make up your website, without needing separate FTP software.
- Databases (MySQL Databases / phpMyAdmin) — where WordPress stores every post, page, setting, and comment. You'll create one database here during installation.
- Domains — where you add, park, or point domains and subdomains to specific folders on your hosting account.
- Email Accounts — lets you create addresses like
hello@yourdomain.comdirectly through your hosting plan. - Softaculous Apps Installer — a one-click installer for WordPress and hundreds of other applications. This is the tool that makes Section 3 of this guide take five minutes instead of an hour.
- SSL/TLS Status — where you activate free SSL certificates (usually via AutoSSL or Let's Encrypt) to enable
https://on your domain.
It's worth knowing that not every host uses cPanel by name — some, particularly newer or budget-focused providers, use their own custom-branded panel (Hostinger's hPanel and Plesk are the two most common alternatives). The underlying concepts and menu names below map almost one-to-one even if your provider's interface looks slightly different, so this guide will still get you where you need to go either way.
Connect Your Domain to Your Hosting {#connect-domain}
Before WordPress can go anywhere, your domain name needs to actually point at your hosting account. DNS (Domain Name System) is the system that translates a human-readable domain name into the numeric server address where your website files actually live — and connecting a domain is really just telling DNS which server to send visitors to.
If you bought your domain through the same company as your hosting, this step is frequently done automatically and you can skip ahead to Section 3. If your domain and hosting are with two different companies — a very common setup — you'll need one of the two methods below.
Method 1: Changing Nameservers (Most Common)
This is the simplest method and the one most hosting providers recommend by default.
- Find your host's nameservers. These are listed in your welcome email or inside cPanel's General Information widget, and typically look like
ns1.yourhost.comandns2.yourhost.com. - Log in to the site where you originally bought your domain (Namecheap, GoDaddy, Google Domains, or similar).
- Find the domain's Nameservers or DNS Management section.
- Replace the existing nameservers with the two (sometimes more) provided by your host.
- Save the change.
Method 2: Manual DNS (A Record) Pointing
Use this method if you want to keep your domain's existing nameservers — for example, because you're using a third-party DNS service for extra features.
- In cPanel, find your server's IP address under General Information.
- Log in to your domain registrar and open its DNS Zone Editor.
- Edit (or create) an A record: set the Host to
@and the Value to your server's IP address. - Add a second A record (or a CNAME) for
wwwpointing to the same place, so bothyourdomain.comandwww.yourdomain.comresolve correctly. - Save the changes.
Waiting for Propagation
Either method requires DNS propagation — the time it takes for the change to spread across the internet's various DNS servers. This is typically anywhere from a few minutes to 24–48 hours. You can check progress at any global propagation checker site, or simply try visiting your domain periodically; once it loads (even to a default hosting placeholder page), you're ready to move on.
Install WordPress (Step-by-Step) {#install-wordpress}
With your domain connected, installing WordPress itself is the fastest part of this entire process, thanks to a one-click installer nearly every host includes.
Using the Softaculous One-Click Installer
- Log in to cPanel and find Softaculous Apps Installer (or a dedicated WordPress icon — many hosts feature it directly on the dashboard).
- Click WordPress, then Install Now.
- Choose Protocol — select
https://if your SSL certificate is already active (check SSL/TLS Status first); otherwise, choosehttp://for now and force the switch to HTTPS in Section 4 once SSL is on. - Choose Domain — select your connected domain from the dropdown.
- In Directory — leave this field completely blank. This is the single most common beginner mistake: filling in anything here (even "wp") installs WordPress inside a subfolder like
yourdomain.com/wp/instead of at your actual root domain. - Under Site Settings, enter your Site Name and a short Site Description (both can be changed later in WordPress itself).
- Under Admin Account, choose an admin username that is not "admin" — this single default is the first thing automated attacks try — along with a strong, unique password and your real email address.
- Choose your site's default language.
- Under Advanced Options, you can optionally change the table prefix from the default
wp_to a random string, which adds a small extra layer of security against automated database attacks. The database name can typically be left as the auto-generated default. - Skip any theme selection offered at this stage — Section 5 of this guide covers choosing the right one properly.
- Click Install, and wait roughly one to three minutes for the installer to finish.
- Once complete, Softaculous displays your site URL and a direct link to your admin dashboard, normally at
yourdomain.com/wp-admin. Save both the URL and your login credentials somewhere secure.
Manual Installation (For Full Control)
A small minority of hosts don't offer Softaculous, or some developers prefer installing manually for full control over file structure. The process is: download the latest WordPress package from wordpress.org, create a MySQL database and a database user through cPanel's MySQL Databases tool, upload the WordPress files to your root directory via File Manager or FTP, then visit your domain to run WordPress's built-in five-minute install script, which asks for your database details and admin account information directly. For the vast majority of beginners, the Softaculous method above accomplishes the exact same result with far less room for error.
Essential Setup After WordPress Installation {#essential-setup}
A freshly installed WordPress site is functional but not yet properly configured. Log in to yourdomain.com/wp-admin and work through this list in order — each step here directly affects either security, SEO, or basic usability.
Force HTTPS. Go to Settings → General and make sure both the WordPress Address (URL) and Site Address (URL) fields use
https://. If your SSL certificate wasn't active during installation, activate it first in cPanel under SSL/TLS Status (most hosts offer this free via AutoSSL or Let's Encrypt), then update these fields.Set clean permalinks. Go to Settings → Permalinks and select "Post name." By default, WordPress generates ugly URLs like
yourdomain.com/?p=123; the Post name structure produces clean, readable, keyword-friendly URLs likeyourdomain.com/your-post-title/, which is the standard nearly every SEO-conscious site uses.Remove default sample content. Delete the pre-installed "Hello World" post, the "Sample Page," and the default "Hello Dolly" plugin. Under Appearance → Themes, delete any default themes you won't be using, keeping at most one as an emergency fallback.
Set your Site Title and Tagline. Under Settings → General, replace the placeholder tagline ("Just another WordPress site") with something that actually describes your site — this text is pulled into your homepage's SEO metadata by default.
Set your correct timezone. Under Settings → General → Timezone, choose your actual city or UTC offset so scheduled posts and comment timestamps are accurate.
Review your Discussion settings. Under Settings → Discussion, decide whether you want open commenting, comment moderation, or comments disabled entirely — most business sites disable comments on pages while leaving them available on blog posts.
Choose your homepage type. Under Settings → Reading, decide whether your homepage should show your latest blog posts or a static page — most business and portfolio sites use a static homepage with a separate page for the blog.
Create your core pages. At minimum: Home, About, Contact, and a Privacy Policy — WordPress includes a built-in Privacy Policy page generator under Settings → Privacy to help draft the required disclosures.
Connect analytics. Setting up Google Analytics from the very start means you have usable data from day one instead of a gap in your history. The plugin-based setup for this is covered directly in the plugins section below, and if you want the full picture of how to actually read that data once it starts flowing in, that's covered in detail in our Google Web Analytics guide.
Install an SEO-Structured Theme {#seo-theme}
An SEO-structured theme is a WordPress theme built with clean, minimal code, fast loading times, and proper semantic HTML — the technical foundation search engines need to crawl, understand, and rank a page efficiently, before a single word of your actual content is even evaluated. A beautiful theme built on bloated code can actively hurt your rankings; a well-coded theme gives every page a fair starting point.
A handful of characteristics separate a genuinely SEO-structured theme from an ordinary one: a small CSS and JavaScript footprint that keeps load times low, semantic HTML5 markup (proper <header>, <nav>, <main>, <article>, and <footer> tags rather than a wall of generic <div>s), built-in schema markup support, full mobile responsiveness, and active, regular developer updates. How much of this actually matters for your rankings — particularly the load-time piece — comes down to Core Web Vitals, which is covered in full depth in our Technical SEO Optimization guide if you want to understand exactly what search engines are measuring.
Themes that consistently meet this bar:
| Theme | Free Tier | Best For | Notable Strength |
|---|---|---|---|
| GeneratePress | Yes | Beginners and blogs | Extremely lightweight, minimal bloat |
| Astra | Yes | Business sites, WooCommerce | Huge starter-template library |
| Kadence | Yes | Design-forward sites | Strong built-in customizer options |
| Neve | Yes | Small business, agencies | Fast setup wizard for beginners |
Installing and Setting Up Your Theme
- In wp-admin, go to Appearance → Themes → Add New.
- Search for your chosen theme by name, click Install, then Activate.
- If the theme offers a companion plugin with starter templates (Astra and Kadence both do this), install it and import a starter template close to what you're building — this saves hours compared to designing from a blank page.
- Go to Appearance → Customize to set your Site Identity (logo, favicon), colors, typography, and header/footer layout.
- Test how the site looks on mobile using your browser's device toolbar (in Chrome, right-click → Inspect → the device icon) before publishing anything.
- Run a baseline speed check using Google PageSpeed Insights so you have a "before" number to compare against once your content and plugins are in place.
Useful Plugins: Installation & Setup {#plugins}
A plugin is a software add-on that extends WordPress's core functionality — adding features like SEO tools, contact forms, security scanning, or caching — without requiring you to write any custom code. Every plugin below installs the same way: go to Plugins → Add New, search for it by name, click Install Now, then Activate. What differs is the configuration step afterward, which is where most of the actual value gets set up.
SEO Plugin — Rank Math or Yoast SEO
Both are strong, free options; Rank Math's free tier includes a few more built-in features, while Yoast has the longer track record. After activating either one, run through its setup wizard, connect it to Google Search Console, and confirm it's generating an XML sitemap automatically — you'll find the sitemap URL inside the plugin's settings, typically at yourdomain.com/sitemap_index.xml. If you want the complete picture of how to actually use these settings to rank pages — title tags, meta descriptions, internal linking, keyword targeting — that entire process is covered in our Search Engine Optimization guide.
Caching / Performance Plugin — WP Rocket or LiteSpeed Cache
A caching plugin stores a ready-to-serve version of your pages so WordPress doesn't have to rebuild them from the database on every single visit. WP Rocket is a strong paid option with minimal configuration needed out of the box; LiteSpeed Cache (free, and especially effective if your host runs LiteSpeed servers) or WP Super Cache are solid free alternatives. After activating, enable page caching and browser caching, and turn on CSS/JS minification if the plugin offers it — then re-run your PageSpeed check to confirm the improvement.
Security Plugin — Wordfence or Sucuri
Install one of these, run its initial malware scan, and enable its firewall. Both also offer login attempt limiting, which blocks the repeated automated login guesses that hit every public WordPress site sooner or later.
Backup Plugin — UpdraftPlus
Set up an automatic backup schedule (daily or weekly, depending on how often your content changes) and connect it to a cloud storage destination like Google Drive or Dropbox rather than leaving backups sitting only on the same server they're protecting. Run one manual backup immediately after setup to confirm the connection actually works before you need it in an emergency.
Forms Plugin — WPForms or Contact Form 7
Either lets you build a basic contact form through a visual editor and embed it on your Contact page using a short block or shortcode, with submissions arriving directly in your inbox.
Image Optimization Plugin — Smush or ShortPixel
Large, unoptimized images are one of the most common causes of a slow WordPress site. These plugins compress images automatically as you upload new ones, and can run a one-time bulk optimization pass across everything already in your media library.
Analytics Plugin — Site Kit by Google
Site Kit connects Google Analytics, Search Console, and PageSpeed Insights directly into your WordPress dashboard in one setup flow, which is generally the simplest way to get analytics tracking installed correctly on a first build without manually editing any code.
A Note on Plugin Count
Every plugin adds some amount of code that has to load on your site, and a handful of well-chosen, well-maintained plugins covering the categories above will always outperform a dozen overlapping ones covering the same ground. Before installing anything beyond this list, it's worth asking whether an existing plugin can already do the job.
Go-Live Checklist
- SSL active and both WordPress URLs set to
https:// - Permalinks set to "Post name"
- Default sample content removed
- Core pages published (Home, About, Contact, Privacy Policy)
- SEO plugin configured and sitemap generated
- Sitemap submitted to Google Search Console
- Caching plugin active
- Security plugin active with an initial scan completed
- Backup schedule configured and tested
- Mobile responsiveness checked
- Baseline PageSpeed score recorded
Frequently Asked Questions
Do I need to know how to code to build a WordPress website?
No. Every step in this guide — from installation through theme and plugin setup — happens through visual dashboards. Coding knowledge becomes useful later if you want custom design changes beyond what your theme's customizer offers, but it isn't required to launch a complete, professional site.
How long does domain propagation actually take?
It varies by registrar and location, ranging from a few minutes to 48 hours. Most changes are visible within 2–6 hours in practice, with the full 48-hour window being a safety margin rather than the typical case.
Should I install WordPress in the root domain or a subdirectory?
For a primary website, always install at the root (leave the "In Directory" field blank during installation). Subdirectory installs are only useful for specific cases, like testing a new site privately before launch.
Rank Math or Yoast SEO — which should I choose?
Both are capable, well-maintained plugins that cover the same core needs. Rank Math's free tier is somewhat more feature-complete out of the box; Yoast has a longer history and a very large support community. Either is a reasonable choice, and switching later is possible but adds unnecessary extra work — pick one early and stick with it.
How many plugins is too many?
There's no fixed number, since a well-coded plugin adds far less overhead than a poorly coded one. As a practical guideline, most well-built small business sites run somewhere between 8 and 15 plugins covering the categories in this guide. If you find yourself installing two plugins for the same job, that's a clearer signal to trim than the total count is.
Your site is now live, secured, permalink-structured, theme-configured, and running the core plugins every professional WordPress build needs. From here, the work shifts from setup to content — and that's exactly where the rest of this course picks up.
— Written by Sayad Md Bayezid Hosan for the SmartGen blog
 ✓
✓
Sayad Md Bayezid Hosan
Founder & Tech Entrepreneur | Full-Stack Developer
Full-stack Web Developer, Digital Marketing Strategist, and Tech Entrepreneur with 5+ years of experience delivering innovative digital solutions. Specializing in web development, AI integration, strategic digital marketing, and tech entrepreneurship. As a leading Tech Provider, I help audiences navigate digital platforms safely through permission-based technical solutions and digital business asset management.
Credentials & Expertise:
- Founder of CWB Agency & GenZFrontier
- Final-year English Student at Northern University Bangladesh
- Specialized in AI-powered web development & content strategy
- Published author on tech, digital marketing & entrepreneurship
** Related Guide
- Google Ads Guide: Search Engine Marketing
- Search Engine Optimization (SEO)
- Creating a WordPress Website — The Complete A to Z Mega Guide for Beginners
- Off-Page Optimization
- Customization and Advanced Features
- Email Marketing
- Algorithm Updates and Analysis
- Analysis and Keyword Research
- On-Page SEO Optimization
- Local SEO & Google Business Profile
This article was written by Sayad Md Bayezid Hosan for the SmartGen blog. For free tools to support your website and marketing journey, visit smartgentools.com.
SmartGen · WordPress · Web Hosting · cPanel · WordPress Tutorial · SEO Theme · WordPress Plugins