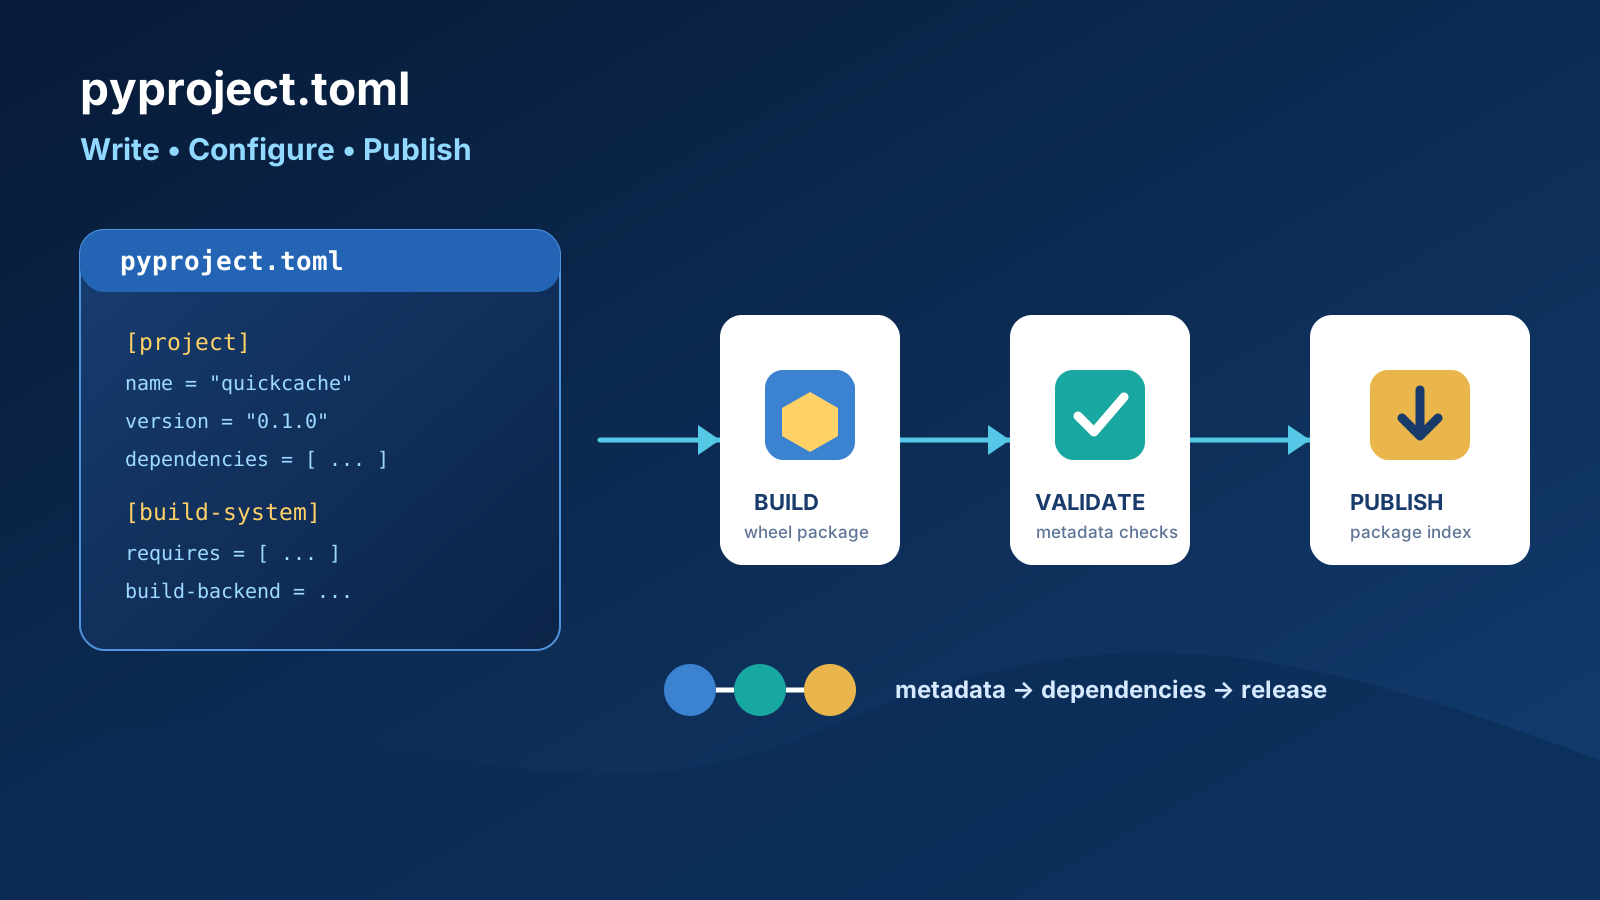

pyproject.toml Guide: Write, Configure & Fix Common Errors (2026)
If you have ever opened a Python repository and found setup.py, setup.cfg, requirements.txt, and a half-finished MANIFEST.in all fighting for control of the same project, you already know why pyproject.toml exists. It replaces that pile of files with a single, readable configuration file that every modern Python tool — pip, build, Hatch, Poetry, uv, linters, type checkers — knows how to read.
This guide walks through the whole thing end to end: what each field actually does, a full working example you can copy, a step-by-step walkthrough for starting from zero, a migration path from setup.py, and — because this is where almost everyone gets stuck — a dedicated troubleshooting section that explains why the most common errors happen and exactly how to fix them. It also covers something a lot of 2024- and 2025-era tutorials still get wrong: the license field's format changed under PEP 639, and the old syntax now throws a build error on current tooling. That gets its own section below.
Quick Answer
The smallest working pyproject.toml needs just two tables:
[build-system]
requires = ["hatchling"]
build-backend = "hatchling.build"

[project]
name = "your-package-name"
version = "0.1.0"
[build-system] tells installers which tool turns your source code into an installable package. [project] holds the metadata — name, version, dependencies, and so on — that almost every tool reads the same way. A third table, [tool], holds settings specific to individual tools like Ruff, Black, or pytest, and isn't standardized at all. Everything below explains how to fill these in properly, field by field, plus the mistakes that break each one.
What Is pyproject.toml, and Why Did It Replace setup.py?
For most of Python's packaging history, project metadata lived inside setup.py — a file that had to be executed before a tool could even find out your package's name or dependencies. That created a real problem: to learn what your project needed to build itself, pip first had to run arbitrary Python code, which meant the build environment already had to have the right dependencies installed just to discover what dependencies it needed. It was slow, inconsistent across machines, and quietly insecure, since installing a package could mean running someone else's code before you'd agreed to anything.
Two Python Enhancement Proposals fixed this in stages. PEP 518 (2017) introduced pyproject.toml itself, solving the immediate problem by giving tools a static, declarative place — the [build-system] table — to list what's needed before any code runs. PEP 621 (2020) went further and standardized general project metadata (name, dependencies, authors, and so on) into the [project] table, so that metadata could finally be read the same way regardless of which build tool a project used.
setup.py isn't strictly forbidden today — it's still valid, and some projects keep a slimmed-down version around for genuinely programmatic needs, like compiling a C extension with logic that can't be expressed declaratively. But for a new project, there's no longer a reason to start there. The [project] table covers the vast majority of what setup() used to do, without needing to execute anything.
TOML itself (Tom's Obvious, Minimal Language) is the format doing the heavy lifting here. It reads like a slightly stricter INI file — sections in square brackets, key = value pairs, native support for strings, arrays, and nested tables — and it's the same format Rust's Cargo uses for Cargo.toml, which is part of why it was chosen: predictable, boring, and easy to parse without ambiguity.
The Three Tables Inside Every pyproject.toml
| Table | Required? | Purpose |
|---|---|---|
[build-system] |
Strongly recommended for every project | Declares which build backend turns your source into a wheel/sdist, and what's needed to run it |
[project] |
Used by most backends | Your project's metadata: name, version, dependencies, description, and so on |
[tool] |
Optional, per-tool | Tool-specific settings, e.g. [tool.ruff], [tool.pytest.ini_options]. Format is defined entirely by each tool |
One exception worth knowing about: Poetry, before version 2.0 (released January 2025), didn't use [project] at all — it kept everything under [tool.poetry] instead. Poetry 2.0+ supports both, but if you're reading an older Poetry project, that's why the metadata looks like it's in the "wrong" place.
Step 1: Choose and Declare Your Build Backend — [build-system]
The build backend is the program that actually turns your source files into a distributable package (a wheel and/or source distribution). [build-system] has two keys: build-backend, which names it, and requires, a list of what needs to be installed to run it — typically just the backend itself, sometimes with a version floor.
You'll generally copy this straight from whichever backend's documentation, but here's what the current versions look like for the most common options:
| Backend | requires |
build-backend |
Good for |
|---|---|---|---|
| Hatchling | "hatchling>=1.26" |
"hatchling.build" |
New projects wanting sensible defaults with minimal config |
| setuptools | "setuptools>=77.0.3" |
"setuptools.build_meta" |
Existing projects, C extensions, the most battle-tested option |
| Flit | "flit_core>=3.12,<4" |
"flit_core.buildapi" |
Simple pure-Python packages, minimal configuration |
| PDM | "pdm-backend>=2.4.0" |
"pdm.backend" |
Projects already using PDM for dependency management |
| uv-build | "uv_build>=0.11.23,<0.12.0" |
"uv_build" |
Projects already using uv, fastest install/build step |
| Poetry-core | "poetry-core>=2.2.0" |
"poetry.core.masonry.api" |
Projects using Poetry for dependency locking |
For a caching library called quickcache, using Hatchling, that section looks like this:
[build-system]
requires = ["hatchling>=1.26"]
build-backend = "hatchling.build"
None of these are objectively "correct" — they all produce a standard wheel that pip can install. If you don't already have a preference, Hatchling is a reasonable default for a new pure-Python project: minimal configuration, sensible defaults, and current SPDX license support (more on why that matters shortly).
Step 2: Static vs. Dynamic Metadata
Most [project] fields are just written directly: requires-python = ">=3.9", version = "1.2.0". But sometimes you don't want to hardcode a value — the most common case is version numbers, which people often want to read from a __version__ variable in their code or from a Git tag, rather than typing the number twice.
For that, mark the field as dynamic, and let the build backend fill it in at build time:
[project]
dynamic = ["version"]
The exact mechanism for how a dynamic field gets its value depends entirely on your backend's own configuration — for Hatchling, for example, you'd add a [tool.hatch.version] table pointing at the source. The one field that can never be dynamic is name, since tools need it to even know what project they're looking at.
Step 3: The Required Basics — name and version
[project]
name = "quickcache"
version = "0.1.0"
name is the only field that's both required and can never be dynamic. It's also more restrictive than it looks: it must be made of ASCII letters, digits, underscores, hyphens, and periods, and it can't start or end with an underscore, hyphen, or period. Comparisons are case-insensitive, and runs of _, -, and . are treated as interchangeable — so Quick-Cache, quick.cache, and QUICK__cache all resolve to the same registered project on PyPI. This is exactly the rule that trips people up when a name has spaces or symbols in it (more in the mistakes section below).
version is technically required too, but in practice it's one of the most commonly dynamic fields, for the reason above — most people don't want to hand-edit a version number in two places every release.
Step 4: Declare Your Dependencies
requires-python
[project]
requires-python = ">=3.9"
This declares the minimum Python version your project supports. One thing worth knowing: resist the urge to add an upper bound here, like requires-python = ">=3.9,<3.13". It feels safe, but it tends to actively break things — it prevents your package from being installed at all on Python versions that come out after you publish, even if your code would have worked fine on them. Pin upper bounds on individual dependencies if you must, not on Python itself.
dependencies
[project]
dependencies = [
    "httpx>=0.27",
    "click>=8.1",
    "colorama>=0.4; sys_platform == 'win32'",
]
Each string is a standard dependency specifier: package name, optional version constraints, and optionally an environment marker after a semicolon — the colorama line above only installs on Windows, for example. Everything in this list gets installed automatically whenever someone runs pip install quickcache, so this is only for things every user of your package genuinely needs.
optional-dependencies (extras)
[project.optional-dependencies]
redis = ["redis>=5.0"]
cli = ["rich>=13.0", "click>=8.1"]
dev = ["pytest>=8.0", "mypy>=1.10"]
Each key here defines a named "extra." Someone who only needs the Redis backend installs it with pip install quickcache[redis], which pulls in the base package plus whatever's listed under that key. This is the right tool when a dependency is only needed for one feature of your package — not for general development tooling, which brings us to the next section.
Step 5: Separate Dev Dependencies With [dependency-groups]
This is the newest piece of the standard, and it's worth understanding even though it's optional, because it solves a real, long-standing mess.
Before this existed, every tool invented its own private spot for "dependencies you need to develop the project, but that shouldn't ship to your users" — pytest, mypy, sphinx, and so on. Poetry used [tool.poetry.group.dev.dependencies]. PDM used [tool.pdm.dev-dependencies]. Early uv used [tool.uv.dev-dependencies]. None of them could read each other's tables, so switching tools meant rewriting your dev dependencies from scratch.
PEP 735 standardizes this with a new top-level table — not nested inside [project] — called [dependency-groups]:
[dependency-groups]
test = ["pytest>=8.0", "pytest-cov>=5.0"]
docs = ["sphinx>=7.0", "sphinx-rtd-theme"]
typing = ["mypy>=1.10", "types-redis"]
dev = [{include-group = "test"}, {include-group = "typing"}]
Groups can reference other groups with {include-group = "name"} instead of duplicating entries, which is how the dev group above pulls in both test and typing without repeating anything.
Tool support as of 2026: uv has full support (uv sync --group test, uv add --group test pytest), pip added a --group flag for installing from these tables starting in version 25.1, and Poetry reads [dependency-groups] from version 2.2.0 onward, with 2.3.0+ recommended for reliable lockfile behavior. The field that trips people up most: this table sits at the top level of the file, as its own [dependency-groups] heading — not as [project.dependency-groups]. Getting that indentation/nesting wrong is a quiet, common mistake.
Step 6: Describe Your Project for Humans and for PyPI
[project]
description = "A lightweight, pluggable caching library for Python."
readme = "README.md"
authors = [
    {name = "Jordan Kade", email = "jordan@example.com"},
]
maintainers = [
    {name = "Jordan Kade", email = "jordan@example.com"},
]
keywords = ["cache", "caching", "redis", "memoization"]
classifiers = [
    "Development Status :: 4 - Beta",
    "Intended Audience :: Developers",
    "Programming Language :: Python :: 3",
    "Programming Language :: Python :: 3.9",
    "Programming Language :: Python :: 3.13",
]

[project.urls]
Homepage = "https://example.com/quickcache"
Documentation = "https://quickcache.readthedocs.io"
Repository = "https://github.com/example/quickcache"
Issues = "https://github.com/example/quickcache/issues"
Changelog = "https://github.com/example/quickcache/blob/main/CHANGELOG.md"
A few notes worth knowing:
readmeauto-detects its format from the file extension —README.mdis treated as GitHub-flavored Markdown,README.rstas reStructuredText. You can override this explicitly withreadme = {file = "README.txt", content-type = "text/markdown"}if your filename doesn't match the content.classifierscome from a fixed list (browsable at PyPI's classifier list) and are used for browsing and search on PyPI — they don't actually restrict installation. If you listProgramming Language :: Python :: 3.9, that's informational only;requires-pythonis what actually enforces a minimum version.urlspopulates the sidebar links on your PyPI project page. Stick to recognizable labels likeHomepage,Repository,Issues,Documentation, andChangelogwhere you can — PyPI recognizes a specific set of "well-known" labels and displays them with matching icons; anything else still works, just renders as plain text instead.
Step 7: License and License Files — What Changed in 2026
This is the section most existing tutorials get wrong, because the standard changed underneath them. If you've copied a license example from an article written before mid-2025, there's a good chance it's now using a deprecated syntax that current build backends reject outright.
The old, deprecated format wrote license as a table:
# Deprecated (option A) — many build backends now reject this
license = {text = "MIT"}
# Deprecated (option B) — same problem
license = {file = "LICENSE"}
The current format, standardized by PEP 639, treats license as a plain string containing a valid SPDX license expression, and separates out the actual license file(s) into their own key:
[project]
license = "MIT"
license-files = ["LICENSE*"]
You can combine licenses with standard SPDX boolean syntax when a project is multi-licensed:
license = "MIT AND (Apache-2.0 OR BSD-2-Clause)"
And if your license doesn't have an official SPDX identifier, you can register a custom one following the LicenseRef- prefix convention:
license = "LicenseRef-My-Custom-License"
license-files takes a list of glob patterns, not a single fixed filename, which is genuinely useful if you vendor third-party licenses alongside your own:
license-files = ["LICEN[CS]E*", "vendored/licenses/*.txt", "AUTHORS.md"]
Here's the practical part: build backends had to explicitly add support for this new format, and if yours predates that, you'll get a build error saying license should be a table/dict — which is backwards from what you'd expect, since the table format is the old one. That error means your backend version is too old, not that your syntax is wrong. Minimum versions that support the new PEP 639 format:
| hatchling | setuptools | flit-core | pdm-backend | poetry-core | uv-build |
|---|---|---|---|---|---|
| 1.27.0 | 77.0.3 | 3.12 | 2.4.0 | 2.2.0 | 0.7.19 |
If you're on an older pin, bumping the version in [build-system] requires is usually the entire fix.
Step 8: Add Console Scripts, GUI Scripts, and Plugins
If you want pip install quickcache to also drop a command into the user's terminal, declare it under [project.scripts]:
[project.scripts]
quickcache-cli = "quickcache.cli:main"
This installs a quickcache-cli command that's the equivalent of running import sys; from quickcache.cli import main; sys.exit(main()). If your entry point launches a GUI instead of a terminal tool, use [project.gui-scripts] instead — on Windows, this is the difference between your app quietly opening a window versus popping up an unwanted console behind it. On other platforms the two behave identically.
For a plugin system — letting other packages register themselves into yours, the way pytest and Pygments plugins work — use [project.entry-points] with a custom group name:
[project.entry-points."quickcache.backends"]
memory = "quickcache.backends.memory:MemoryBackend"
redis = "quickcache.backends.redis:RedisBackend"
Your own code can then discover whatever's registered under "quickcache.backends" at runtime via importlib.metadata.entry_points(), without needing to know in advance what plugins exist.
Full Example: Every Field Working Together
Here's everything above combined into one coherent, copyable file:
[build-system]
requires = ["hatchling>=1.26"]
build-backend = "hatchling.build"

[project]
name = "quickcache"
dynamic = ["version"]
description = "A lightweight, pluggable caching library for Python."
readme = "README.md"
requires-python = ">=3.9"
license = "MIT"
license-files = ["LICENSE*"]
authors = [
    {name = "Jordan Kade", email = "jordan@example.com"},
]
maintainers = [
    {name = "Jordan Kade", email = "jordan@example.com"},
]
keywords = ["cache", "caching", "redis", "memoization"]
classifiers = [
    "Development Status :: 4 - Beta",
    "Intended Audience :: Developers",
    "Programming Language :: Python :: 3",
    "Programming Language :: Python :: 3.9",
    "Programming Language :: Python :: 3.13",
]
dependencies = [
    "click>=8.1",
]

[project.optional-dependencies]
redis = ["redis>=5.0"]
cli = ["rich>=13.0"]

[dependency-groups]
test = ["pytest>=8.0", "pytest-cov>=5.0"]
typing = ["mypy>=1.10"]
dev = [{include-group = "test"}, {include-group = "typing"}]

[project.urls]
Homepage = "https://example.com/quickcache"
Repository = "https://github.com/example/quickcache"
Issues = "https://github.com/example/quickcache/issues"

[project.scripts]
quickcache-cli = "quickcache.cli:main"

[project.entry-points."quickcache.backends"]
memory = "quickcache.backends.memory:MemoryBackend"
redis = "quickcache.backends.redis:RedisBackend"

[tool.hatch.version]
path = "src/quickcache/__init__.py"
Build Your First pyproject.toml From Scratch (Step-by-Step)
If you're starting a brand-new project, here's the whole path from an empty folder to an installable package.
Create the project structure. A "src layout" — putting your package inside a
src/folder — is worth adopting even for small projects, because it prevents Python from accidentally importing your uninstalled source code instead of the properly installed package during testing:quickcache/ ├── src/ │ └── quickcache/ │ ├── __init__.py │ └── cli.py ├── tests/ ├── pyproject.toml └── README.mdWrite a minimal
pyproject.tomlat the root:[build-system] requires = ["hatchling>=1.26"] build-backend = "hatchling.build" [project] name = "quickcache" version = "0.1.0" description = "A lightweight caching library." requires-python = ">=3.9"Create and activate a virtual environment, so you're not installing anything system-wide:
python -m venv .venv
source .venv/bin/activate   # On Windows: .venv\Scripts\activate
Install the
buildpackage, which is the standard PyPA tool for producing distributions:pip install buildBuild it:
python -m buildThis creates a
dist/folder containing both a wheel (.whl) and a source distribution (.tar.gz).Install it locally in editable mode while you're developing, so code changes show up immediately without rebuilding:
pip install -e .Confirm it imports correctly:
python -c "import quickcache; print(quickcache.__file__)"
From here, everything else — dependencies, entry points, classifiers — is just adding more fields to the [project] table you already have.
Migrating an Existing setup.py Project (Step-by-Step)
If you're modernizing an older project rather than starting fresh, the mapping from setup() keyword arguments to [project] fields is mostly one-to-one:
Old (setup.py argument) |
New (pyproject.toml field) |
|---|---|
name= |
name |
version= |
version (or dynamic = ["version"]) |
install_requires= |
dependencies |
extras_require= |
[project.optional-dependencies] |
python_requires= |
requires-python |
author=, author_email= |
authors = [{name=..., email=...}] |
long_description= |
readme |
url= |
[project.urls] Homepage = ... |
classifiers= |
classifiers |
entry_points={"console_scripts": [...]} |
[project.scripts] |
Practical steps:
- Add a
[build-system]table first, even before touching anything else. Just its presence — even in an otherwise emptypyproject.toml— changes pip's default behavior to build your project in an isolated environment, which is itself a meaningful reliability improvement:[build-system] requires = ["setuptools>=77.0.3"] build-backend = "setuptools.build_meta" - Copy your metadata across using the mapping table above.
- Decide whether
setup.pystill needs to exist. It's completely valid for it to remain if you have genuinely programmatic build logic — compiling a C extension, for instance. If yoursetup.pyonly ever calledsetup()with static keyword arguments, you can delete it once everything's been moved. - Keep
MANIFEST.inonly if you're bundling non-Python files into your source distribution that need custom inclusion rules; it still works alongsidepyproject.toml. - Rebuild and compare. Run
python -m buildand check that the file listing inside the new wheel/sdist matches what the old setup produced —unzip -l dist/*.whlis a quick way to eyeball it.
Validate Your File Before You Publish
Three checks, cheapest first:
1. Confirm it's valid TOML at all, using Python's built-in parser (3.11+; use the tomli package on older versions):
python -c "import tomllib; print(tomllib.load(open('pyproject.toml', 'rb')))"
If this throws an error, you have a syntax problem — a stray quote, a duplicate table, bad indentation — before you even get to whether the content is valid.
2. Check it against the packaging specification itself with validate-pyproject, a dedicated schema-based validator that checks compliance with PEP 517, 518, 621, 639, and 735 in one pass:
pip install validate-pyproject
validate-pyproject pyproject.toml
It can also run as a pre-commit hook, so this check happens automatically before every commit rather than only when you remember to run it manually.
3. Do a real build as a smoke test. A broken pyproject.toml will usually fail immediately here, with a much clearer error than pip gives you downstream:
python -m build --sdist
12 Common pyproject.toml Mistakes (and Exactly How to Fix Each One)
These are drawn from real, recurring issues across pip, uv, Poetry, and setuptools — not hypothetical ones.
1. Missing the [build-system] table entirely
Symptom: Inconsistent build behavior, or tools falling back to legacy assumptions you didn't intend.
Fix: Add it, even if you add nothing else:
[build-system]
requires = ["hatchling>=1.26"]
build-backend = "hatchling.build"
2. An invalid project name
Symptom: An error like Not a valid package or extra name, often triggered by a name with a space or symbol in it, e.g. name = "my cool package".
Fix: Use only letters, digits, hyphens, underscores, and periods, and don't start or end with a separator:
name = "my-cool-package"
3. version is missing and not marked dynamic
Symptom: A validation error complaining that required metadata is absent.
Fix: Either set it directly, or explicitly mark it dynamic and configure your backend to supply it:
version = "0.1.0"
# or
dynamic = ["version"]
4. A field is both static and dynamic at the same time
Symptom: A metadata conflict error — this happens when a field like dependencies has a real value and also appears in the dynamic list.
Fix: Pick one. If a build backend is computing it for you, remove the static value and leave only the dynamic entry (or vice versa).
5. Using the old license = {file = "..."} table format
Symptom: A build error saying license should be a string, not a table — on any backend version listed in the PEP 639 support table above.
Fix: Switch to the SPDX string format:
license = "MIT"
license-files = ["LICENSE*"]
6. build-backend doesn't match the package in requires
Symptom: A build backend import failure — the tool named in build-backend isn't actually installed, because it wasn't listed in requires.
Fix: Make sure the two agree. If you use Hatchling, both lines need to say Hatchling:
[build-system]
requires = ["hatchling>=1.26"]
build-backend = "hatchling.build"
7. Dependency specifiers with bad syntax
Symptom: A parse error on your dependency list, often from missing quotes around a version constraint or a malformed environment marker.
Fix: Every dependency is a quoted string, constraint and all:
dependencies = [
    "requests>=2.31",
    "colorama>=0.4; sys_platform == 'win32'",
]
8. An overly strict requires-python upper bound
Symptom: Your package becomes uninstallable on newer Python releases the moment they come out, even though nothing about your code actually breaks.
Fix: Avoid upper bounds on requires-python specifically — use a lower bound only, and pin upper bounds on individual dependencies instead if one of them has a known incompatibility.
9. A [project.scripts] entry pointing at the wrong path
Symptom: The installed command exists but crashes immediately with an import error.
Fix: The value must be "module.path:function_name", matching your actual source layout — with a src layout, that's relative to src/, not the repo root:
[project.scripts]
quickcache-cli = "quickcache.cli:main"
10. Duplicate table headers
Symptom: A TOML parse error, or metadata silently overwriting itself — usually the result of copy-pasting a second [project] block from another file during a merge.
Fix: Each table header can appear once. Merge the contents under a single [project] heading.
11. A readme path that doesn't match the real file
Symptom: twine check fails on your long description, even though the package still uploads — the check is separate from the upload step.
Fix: Confirm the exact filename and extension:
readme = "README.md"
12. Forgetting license-files
Symptom: Nothing crashes, but your actual LICENSE file never ships inside the built package, which is a real compliance gap for anyone redistributing your code.
Fix: Add the glob explicitly — it doesn't happen automatically just because a LICENSE file exists in your repo:
license-files = ["LICENSE*"]
Building and Publishing Your Package (Quick Path)
Once your file validates and builds cleanly:
- Build both distributions:
python -m build - Sanity-check the result:
pip install twine twine check dist/* - Upload to TestPyPI first — a separate, throwaway index made exactly for this — before touching the real one:
You'll authenticate with usernametwine upload --repository testpypi dist/*__token__and a TestPyPI API token as the password (PyPI and TestPyPI both removed plain password auth in 2024). - Install from TestPyPI to confirm it actually works end to end:
pip install --index-url https://test.pypi.org/simple/ quickcache - Publish for real once you're satisfied:
twine upload dist/*
If you'd rather automate this on every tagged release, GitHub Actions CI/CD workflows are the standard next step — worth setting up once you're publishing more than a couple of times.
Frequently Asked Questions
Do I still need setup.py?
Not for a new project. It remains valid for cases needing genuinely programmatic build logic, like compiling C extensions, but the [project] table covers standard metadata without it.
What's the actual difference between dependencies and [dependency-groups]?dependencies (and optional-dependencies) describe what your published package needs to run, and they ship with it. [dependency-groups] describes what you need to develop it — test runners, linters, docs builders — and none of it is included when someone installs your package from PyPI.
Why does pip suddenly build my project in an isolated environment?
Simply having a pyproject.toml file — even a mostly empty one — changes pip's default behavior to use build isolation, which is generally a good thing for reproducibility.
Can [project] and [tool.poetry] coexist?
Yes, as of Poetry 2.0+. Older Poetry projects (pre-January 2025) only used [tool.poetry], which is why you'll still see that pattern in older repositories.
Is TOML case-sensitive?
Table and key names are case-sensitive, but the name field specifically is compared case-insensitively for PyPI registration purposes, along with treating runs of -, _, and . as equivalent.
What Python version do I need just to read a pyproject.toml myself?
Python 3.11+ includes tomllib in the standard library. For anything earlier, install the tomli package, which implements the same interface.
Key Takeaways
- Every project should have a
[build-system]table, even a minimal one — its mere presence changes how pip builds your project for the better. [project]is the standardized home for metadata; onlynamecan never be dynamic.- The
licensefield's format changed under PEP 639: it's now a plain SPDX string, not a table — and this is the single most common thing outdated tutorials get wrong. - Use
[dependency-groups](a top-level table) for development-only dependencies, and[project.optional-dependencies]for features your users can opt into. - Validate before you publish:
tomllibfor syntax,validate-pyprojectfor spec compliance, and a realpython -m buildas a final smoke test. - Always push to TestPyPI before the real index — it exists specifically so a mistake doesn't cost you a package name or version number on the real one.
Further Reading
- PyPA: Writing your pyproject.toml — the canonical technical reference this guide is built on top of
- PyPA: How to modernize a setup.py based project
- PyPA: Using TestPyPI
- PEP 621 – Storing project metadata in pyproject.toml
- PEP 639 – Improving License Clarity with Better Package Metadata
- PEP 735 – Dependency Groups in pyproject.toml
- validate-pyproject on PyPI
- build on PyPI
- twine on PyPI
— Written by Sayad Md Bayezid Hosan for the SmartGen blog
 ✓
✓
Sayad Md Bayezid Hosan
Founder & Tech Entrepreneur | Full-Stack Developer
Full-stack Web Developer, Digital Marketing Strategist, and Tech Entrepreneur with 5+ years of experience delivering innovative digital solutions. Specializing in web development, AI integration, strategic digital marketing, and tech entrepreneurship. As a leading Tech Provider, I help audiences navigate digital platforms safely through permission-based technical solutions and digital business asset management.
Credentials & Expertise:
- Founder of CWB Agency & GenZFrontier
- Final-year English Student at Northern University Bangladesh
- Specialized in AI-powered web development & content strategy
- Published author on tech, digital marketing & entrepreneurship
Read related :
- What Is Python? A Complete Beginner Guide
- Python Loops & Conditionals Step-by-Step
- Master Python Operators: Step-by-Step Guide
- Python Variables and Data Types Explained
- Python Data Structures Explained: Lists to Dicts
- Python Loop Exercises and String Basics Guide
- GITHUB SECRETS EXPLAINED
- Vite Optimization Guide for CI/CD
Bunas
What is SmartGen
SmartGen Docs is an open-source Python static site generator built specifically for project documentation. It's a pip install-able alternative in the same space as MkDocs and Sphinx, with three deliberate differences:
Zero third-party front-end dependency. No icon fonts, no UI framework, no CDN calls. Every pixel in the default theme is hand-authored CSS and inline SVG. Code syntax highlighting runs server-side through Pygments at build time — highlighted code even with JavaScript disabled.
One toolchain, one config file. smartgen-docs init / serve / build covers scaffolding, a live-reload dev server, and static output. Navigation, theme palette, and site metadata all live in a single smartgen.yml.
Markdown-first, no lock-in. Every page is a plain .md file with YAML front matter. Your content isn't trapped in a proprietary format.
If you're searching for a documentation generator, a markdown to HTML converter, an MkDocs alternative, or a lightweight docs-as-code tool that deploys straight to GitHub Pages, this repo is built for exactly that.
more Read SmartGen Auto Docs
This guide is part of the SmartGen developer tutorials series. If you're new to SmartGen, the full guide to SmartGen's 40+ free tools is a good next stop.