Portfolio Website: Deployment & Blog System Guide
Portfolio Website: Deployment & Blog System Guide
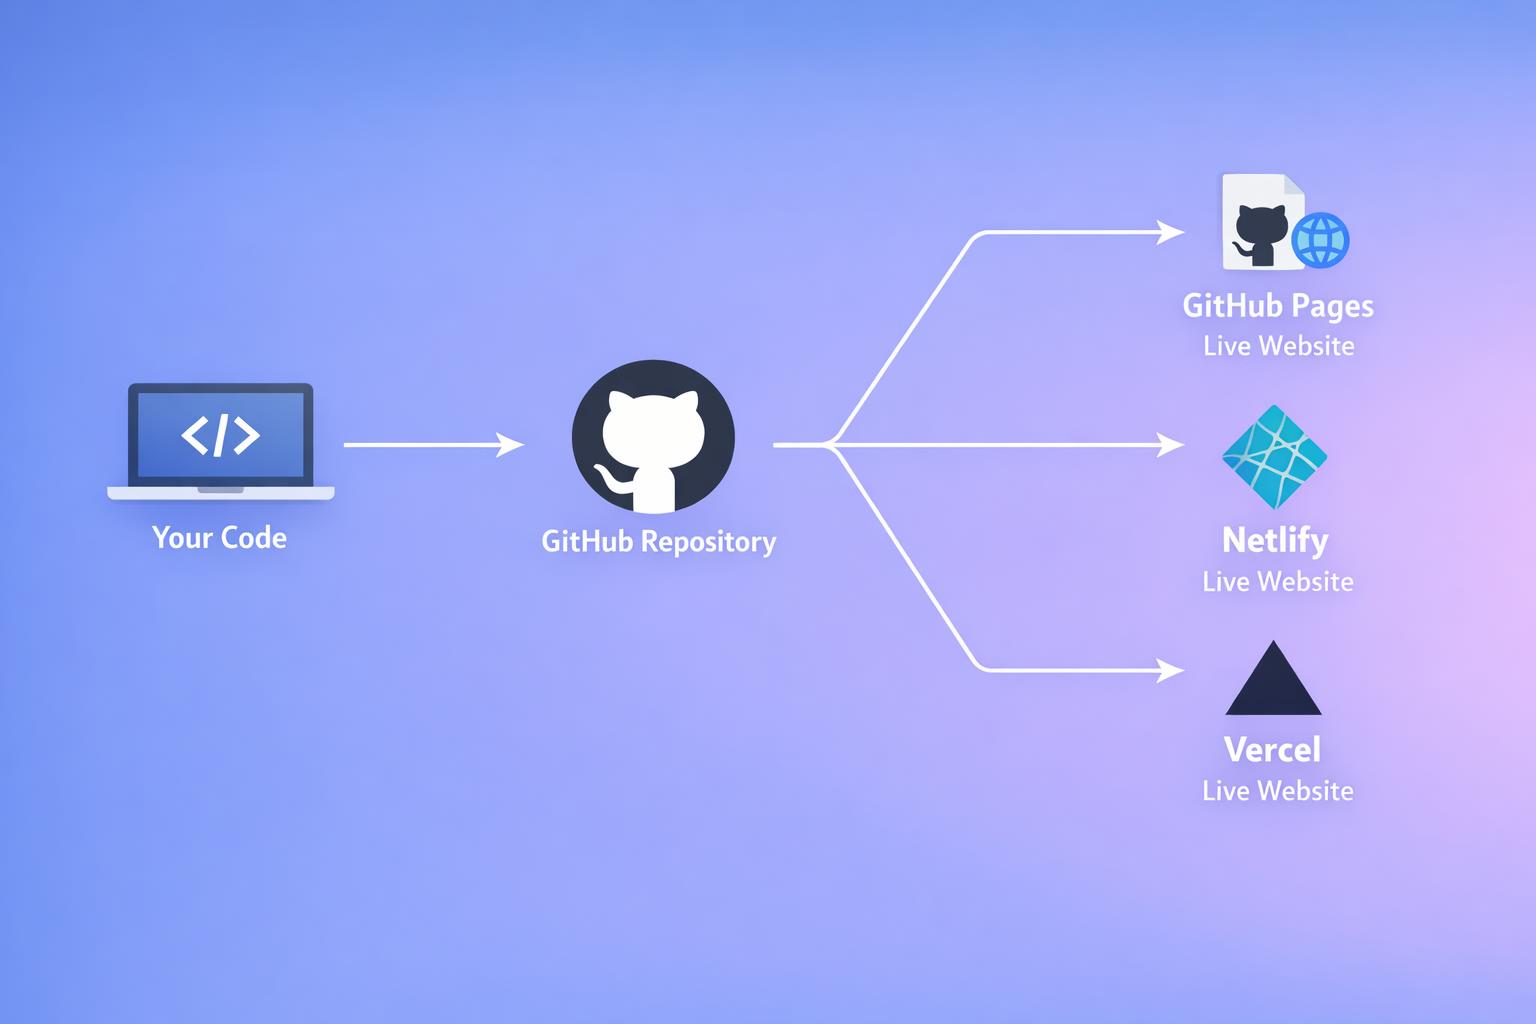
This guide covers two things you'll need once your portfolio is running locally: getting it live on the internet, and understanding how the automated blog system works so you can publish new posts confidently for years to come.
Repository: github.com/bayzed123/sayadbayezid-portfolio-
Prerequisite: This guide assumes you've already completed the Getting Started guide — your project should be personalized via
setup.shand tested locally before deploying.
In this guide
Part 1 — Deployment
- Deployment options overview
- Option A: GitHub Pages
- Option B: Netlify
- Option C: Vercel
- Connecting a custom domain
- Post-deployment checklist
Part 2 — Blog System
- How the blog pipeline works
- Writing posts in Markdown
- Writing posts in HTML (advanced)
- Adding a Table of Contents
- Adding FAQ accordions
- Publishing workflow, step by step
- Blog system troubleshooting
Reference
Part 1 — Deployment
Deployment options overview
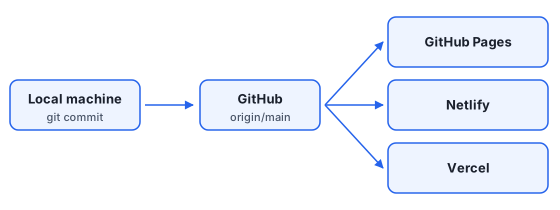
Since this portfolio is a fully static site (plain HTML/CSS/JS with no backend), you have several free hosting options. Here's how they compare:
| Platform | Cost | Custom Domain | Auto-Deploy on Push | Best For |
|---|---|---|---|---|
| GitHub Pages | Free | ✅ Yes | ✅ Yes | Simplest setup, tightly integrated with your repo |
| Netlify | Free tier | ✅ Yes | ✅ Yes | More build features, form handling, redirects |
| Vercel | Free tier | ✅ Yes | ✅ Yes | Fastest global CDN, great for frequent updates |
Tip
All three options are free for personal portfolio use and require zero server management. If you're unsure which to pick, start with GitHub Pages — it requires the fewest steps since your code already lives on GitHub.
Option A: GitHub Pages (Recommended)
Step 1 — Push your personalized code
Make sure your local changes (from running setup.sh) are committed and pushed to your fork:
git add .
git commit -m "chore: personalize portfolio with my info"
git push origin main
Step 2 — Enable GitHub Pages
- Go to your repository on GitHub
- Click Settings (top navigation bar)
- In the left sidebar, click Pages
- Under Build and deployment → Source, select Deploy from a branch
- Under Branch, select
mainand folder/ (root) - Click Save
Step 3 — Wait for deployment
GitHub will show a banner:
Your site is live at https://YOUR_USERNAME.github.io/sayadbayezid-portfolio-/
Note
The first deployment can take 1–3 minutes. If you see a 404 immediately after enabling Pages, wait a minute and refresh — this is normal.
Step 4 — Verify
Visit the URL shown in the banner. You should see your personalized homepage — not the placeholder content.
Warning
If your homepage loads but CSS/images look broken, this is almost always a relative path issue. Check that your<link>and<img>tags use relative paths (assets/css/style.css) rather than absolute root paths (/assets/css/style.css) — GitHub Pages serves your site from a subfolder (/sayadbayezid-portfolio-/), not the domain root, unless you're using a custom domain.
Option B: Netlify
Netlify offers more deployment flexibility and built-in form handling if you plan to expand your contact form later.
Step 1 — Sign up / log in
Go to netlify.com and sign in with your GitHub account.
Step 2 — Create a new site
- Click Add new site → Import an existing project
- Choose GitHub as your Git provider
- Authorize Netlify to access your repositories (if prompted)
- Select your
sayadbayezid-portfolio-fork from the list
Step 3 — Configure build settings
Since this is a static site with no build step required for the homepage:
Build command:      (leave empty)
Publish directory:  .
Click Deploy site.
Step 4 — Wait for deployment
Netlify assigns a random subdomain immediately, e.g.:
https://cheerful-einstein-a1b2c3.netlify.app
You can rename this under Site settings → Change site name.
Tip
Netlify auto-detects future pushes to yourmainbranch and redeploys automatically — no extra configuration needed for continuous deployment.
Option C: Vercel
Vercel is another excellent free option, particularly known for very fast global CDN performance.
Step 1 — Sign up / log in
Go to vercel.com and sign in with GitHub.
Step 2 — Import your repository
- Click Add New → Project
- Select your
sayadbayezid-portfolio-fork - Click Import
Step 3 — Configure project
Since there's no framework/build step:
Framework Preset:   Other
Build Command:      (leave empty)
Output Directory:   .
Click Deploy.
Step 4 — Access your live site
Vercel provides a URL immediately:
https://sayadbayezid-portfolio-yourusername.vercel.app
Connecting a custom domain
If you own a domain (e.g., from Namecheap, Google Domains, or GoDaddy), here's how to connect it — the process is similar across all three platforms.
For GitHub Pages
In your repo root, edit the
CNAMEfile (or create one if missing):yourdomain.comAt your domain registrar, add these DNS records:
Type Name Value A @ 185.199.108.153A @ 185.199.109.153A @ 185.199.110.153A @ 185.199.111.153CNAME www YOUR_USERNAME.github.ioBack in Settings → Pages, enter your custom domain and click Save
Check Enforce HTTPS once the certificate is issued (can take up to 24 hours)
For Netlify / Vercel
Both platforms provide domain-specific DNS instructions automatically:
- Netlify: Site settings → Domain management → Add custom domain
- Vercel: Project → Settings → Domains → Add
Follow the exact DNS records they display — these platforms often support a simpler ALIAS/ANAME record instead of multiple A records.
Warning
DNS changes can take anywhere from a few minutes to 24-48 hours to fully propagate. Don't panic if your custom domain doesn't work immediately — use whatsmydns.net to check propagation status globally.
Post-deployment checklist
Before considering your deployment complete, verify:
- Homepage loads correctly at your live URL
- All navigation links work (no 404s)
- Images and CSS load correctly (check browser DevTools → Network tab for any red/failed requests)
- Blog page loads and displays at least your test post
- Contact form/links point to your actual email, not placeholder
- Custom domain (if used) resolves correctly and shows a valid HTTPS certificate
- Site is mobile-responsive (test on your phone or DevTools' device emulator)
Part 2 — Blog System
Now that your site is live, let's cover how to actually publish content going forward — this is the part that matters most for building the kind of high-value, consistently-updated content that search engines (and AdSense reviewers) reward.
How the blog pipeline works
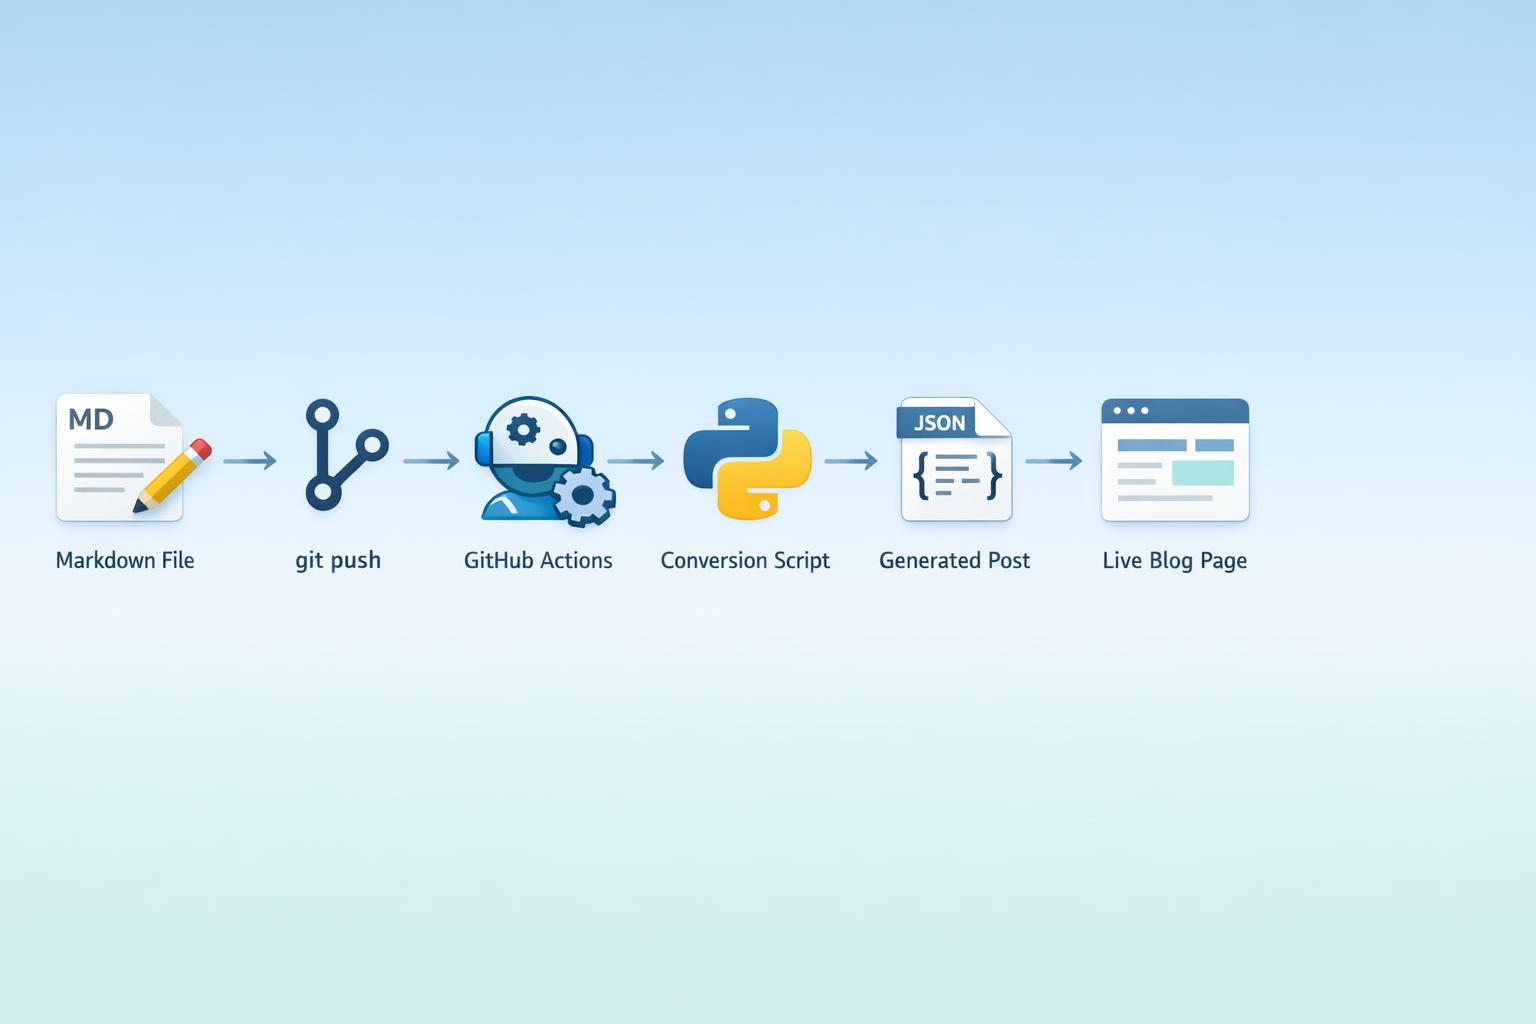
Unlike traditional blogging platforms, there's no dashboard to log into. Publishing works entirely through Git:

The six-step flow
- You write a
.mdor.htmlfile locally - You place it in the
blog_uploads/folder - You push to GitHub (
git push) - GitHub Actions triggers automatically — no manual step required
scripts/convert_blogs.pyruns on GitHub's servers, converting your file into structured JSON- The JSON lands in
blogs/, andblog-loader.htmlfetches + renders it live
Note
This entire pipeline runs on GitHub's infrastructure, not your local machine. Once you push, you can close your laptop — the post will still go live within a minute or two.
Writing posts in Markdown
Markdown is the simplest way to publish. Create a new file inside blog_uploads/:
touch blog_uploads/my-first-real-post.md
Use this structure:
# My First Real Post

This is the introduction paragraph. It's automatically used as the excerpt
shown in the blog listing page, so make it count.

## Why This Topic Matters

Explain the core idea here. Use as many paragraphs as needed.

### A Specific Detail

Sub-sections work too, and are automatically included in the Table of Contents.

## Code Examples Work Great

\`\`\`javascript
function example() {
  console.log("Markdown code blocks render with syntax highlighting");
}
\`\`\`

## Conclusion

Wrap up your post here.
Markdown formatting reference
| What You Want | Markdown Syntax |
|---|---|
| Bold text | **bold** |
| Italic text | *italic* |
| Link | [text](https://url.com) |
| Image |  |
| Bullet list | - item |
| Numbered list | 1. item |
| Inline code | `code` |
| Code block | ```language on its own line, then code, then ``` |
| Blockquote | > quoted text |
Tip
The first# Headingin your file becomes the post title automatically — it's extracted and removed from the body, then displayed separately by the template. Don't include a title anywhere else in the file.
Writing posts in HTML (advanced)
For more visual control — custom layouts, embedded widgets, interactive elements — you can write posts directly in HTML instead of Markdown. Save the file with a .html extension in the same blog_uploads/ folder.
<h1>My Advanced Post Title</h1>
<meta name="description" content="A short summary for SEO purposes">

<p>Your intro paragraph goes here.</p>

<h2>A Major Section</h2>
<p>Content for this section.</p>

<img src="https://yourdomain.com/assets/images/blog/example.png" alt="Descriptive alt text">

<h2>Another Section</h2>
<p>More content.</p>
Warning
Always use absolute image URLs (https://yourdomain.com/...) in blog posts, not relative paths (../assets/image.png). Since blog posts can be viewed from different URL depths, relative paths frequently break.
Adding a Table of Contents
Every ## (H2) and ### (H3) heading in your post is automatically collected into a Table of Contents — no manual work needed for Markdown posts.
For HTML posts, wrap your intended TOC section like this so it matches the expected structure:
<section class="toc">
  <h3>Table of Contents</h3>
  <ul>
    <li><a href="#section-1">Section 1</a></li>
    <li><a href="#section-2">Section 2</a></li>
  </ul>
</section>

<section id="section-1">
  <h2>Section 1</h2>
  <p>Content...</p>
</section>

<section id="section-2">
  <h2>Section 2</h2>
  <p>Content...</p>
</section>
Note
For Markdown posts, you don't need to write this manually at all — the conversion script auto-generates matchingidattributes on every heading and builds the TOC data structure for you.
Adding FAQ accordions
Interactive collapsible FAQ sections (like the ones in this very guide) are supported out of the box in HTML posts:
<div class="faq-section">
  <button class="accordion">Q: What is this project?</button>
  <div class="panel">
    <p>A: It's an open-source developer portfolio template with automated blogging.</p>
  </div>

  <button class="accordion">Q: Is it free to use?</button>
  <div class="panel">
    <p>A: Yes, it's free under an attribution-required open-source license.</p>
  </div>
</div>
The accompanying JavaScript (already included in assets/js/) handles the expand/collapse behavior automatically — you don't need to write any JS yourself.
Publishing workflow, step by step
Here's the exact sequence you'll repeat every time you publish a new post:
# 1. Create your post file
touch blog_uploads/how-i-built-my-portfolio.md

# 2. Write your content (using any text editor)
code blog_uploads/how-i-built-my-portfolio.md

# 3. Stage and commit
git add blog_uploads/how-i-built-my-portfolio.md
git commit -m "blog: add post about building my portfolio"

# 4. Push — this triggers the automation
git push origin main
Confirming it worked
- Go to your repository on GitHub
- Click the Actions tab
- You should see a workflow run named "Blog Automation" in progress or completed with a green checkmark ✅
✅ Blog Automation
   Triggered by: push
   Duration: ~15s
   Status: Success
- Once it shows success, visit your live blog page — the new post should appear within a minute.
Tip
Bookmark the Actions tab of your repo. It's your single source of truth for whether a post published correctly — far more reliable than just guessing based on the live site.
Blog system troubleshooting
Post doesn't appear after pushing
Check the Actions tab first. If the workflow shows a red ❌, click into it to see the exact error log. Common causes:
| Error Message | Cause | Fix |
|---|---|---|
ModuleNotFoundError: No module named 'bs4' |
Missing dependency in the workflow | Confirm pip install beautifulsoup4 markdown step exists in .github/workflows/blog_automation.yml |
FileNotFoundError: blog_uploads/ |
Folder path issue | Ensure the folder wasn't accidentally renamed or deleted |
| Workflow didn't trigger at all | Path filter mismatch | Confirm your file is inside blog_uploads/ exactly — not a nested subfolder unless intentional |
Post appears, but formatting looks broken
- Missing headings in TOC → Confirm you used
##(not**bold text**) for section headings - Code blocks not highlighted → Confirm you used triple backticks with a language tag (
```javascript, not just```) - Images not loading → Confirm you used absolute URLs, not relative paths
Duplicate posts appearing
This happens if you rename a post file without deleting the old generated JSON. Manually remove the stale file:
rm blogs/old-post-slug.json
git add blogs/
git commit -m "fix: remove stale blog JSON"
git push
Workflow runs but doesn't commit changes
This is actually expected behavior if your content didn't change the generated output — the workflow is designed to skip empty commits. If you expected a change and don't see one, check that you actually edited/added a file inside blog_uploads/ and not somewhere else.
Frequently asked questions
Do I need to run the Python script manually after deploying?
No. Once deployed, GitHub Actions runs the script automatically on every push to blog_uploads/. You only run it manually during local testing, as covered in the Getting Started guide.
Can I edit a post after publishing it?
Yes. Edit the same .md or .html file in blog_uploads/, then commit and push again. The automation will regenerate the corresponding JSON with your updated content.
Can I schedule posts to publish at a future date?
Not natively — the system publishes immediately on push. If you need scheduling, you could use a separate GitHub Action with a cron trigger that moves files from a drafts/ folder into blog_uploads/ on a schedule, though this requires custom workflow configuration beyond the default setup.
How do I delete a published post?
Delete both the source file and its generated JSON, then push:
rm blog_uploads/old-post.md
rm blogs/old-post.json
git add -A
git commit -m "blog: remove old post"
git push
Does this affect my site's SEO negatively since content is JSON-rendered?
Modern Googlebot executes JavaScript and can index client-side rendered content in most cases. However, for maximum SEO reliability on high-priority content, consider supplementing with server-side rendered pages, or ensure your sitemap.xml explicitly lists each blog post URL so search engines discover them even before crawling/rendering JS.
Next steps
- Getting Started Guide — if you haven't completed initial setup yet
- Customization Guide — editing colors, layout sections, and adding new pages
- Start writing your first real post and push it live using the workflow above
Further reading
- WIKI.md — full technical reference for the blog system internals
- GitHub Actions documentation — official docs for understanding workflow YAML syntax further
- Repository Issues — report bugs or request features
|
Previous Portfolio Customization |
Next Portfolio API Reference |
Help and support
Did you find what you needed?
Thank you! We received your feedback.
Privacy policy
Help us make these docs great!
All GitHub docs are open source. See something that's wrong or unclear? Submit a pull request.
⑂ Make a contribution
Learn how to contribute
Still need help?
👥 Ask the SmartGen community
💬 Contact support
Legal
© 2026 SmartGen. Terms Privacy Expert services Blog